This article explains how to identify fuses on SmartBench.
< Previous | List | Next >
First identify the version of your SmartBench which can be found on the user manual document or by going to the system information on your console click here to learn more.
Once you have identified your SmartBench version please see the respective below section
1.2 Fuses can be purchased from here (Specifications are included on the product page)
1.3 Fuses can be purchased from here (Specifications are included on the product page)
For SmartBench version 1.2 or lower
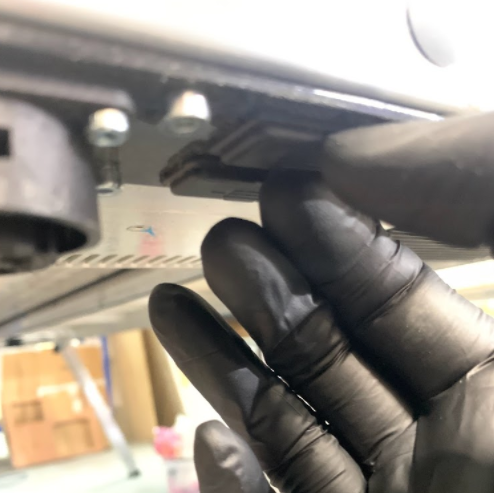
Fuse on SmartBench v1.2 is located on the underside of the Lower X Beam. Next to the fuses you will find a map which identifies the specific component as shown in the image.
A: Fuses

To replace a blown fuse, simply pull the fuse tray down.
|

|
Make sure the mains power is switched off before removing.
|
Remove the blown fuse and replace it with an additional spare fuse found in the tray.

For SmartBench version 1.3
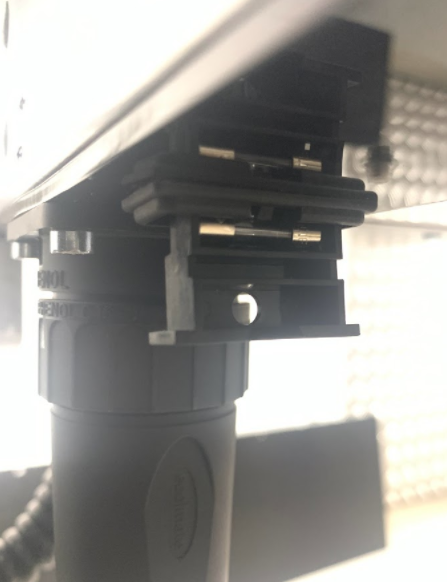
The fuse on SmartBench v1.3 is located on the underside of the Lower X Beam.

To replace a blown fuse, simply pull the fuse tray down.
|
|
Make sure the mains power is switched off before removing.
|

Remove the blown fuse and replace it with an additional spare fuse found in the tray.
< Previous | List | Next >