This article describes how to position and align stock material.
< Previous | List | Next >
Positioning stock material
Position your spoilboard first, if you are using one and you have not done so already.
Unclamp the Upper X Beam, raise it high enough to accommodate the total thickness of the stock material you are planning to use; then reclamp the Upper X Beam in the raised position to prevent it sliding down and locking the material.
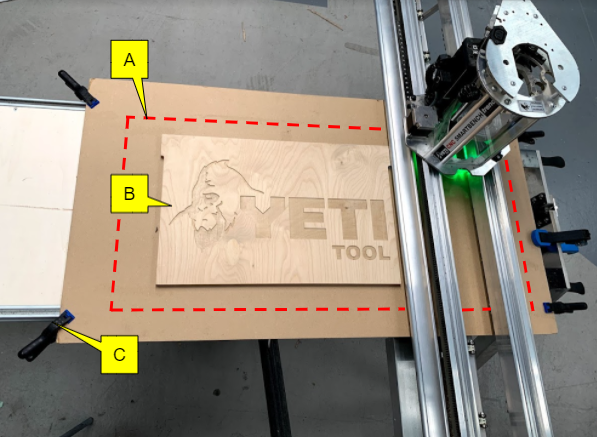
When positioning your stock material, make sure SmartBench can move within the work area without interfering with workholding components, e.g. clamps.
A: Work area
B: Stock material
C: Clamp
Aligning stock material
Option 1: referencing the spoilboard
First, position and align your spoilboard. Click here to learn how to position a spoilboard.
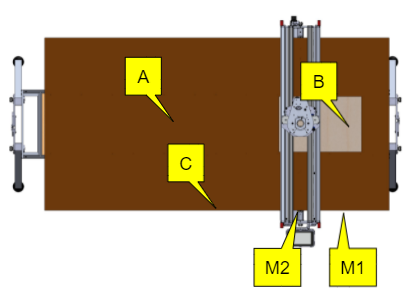
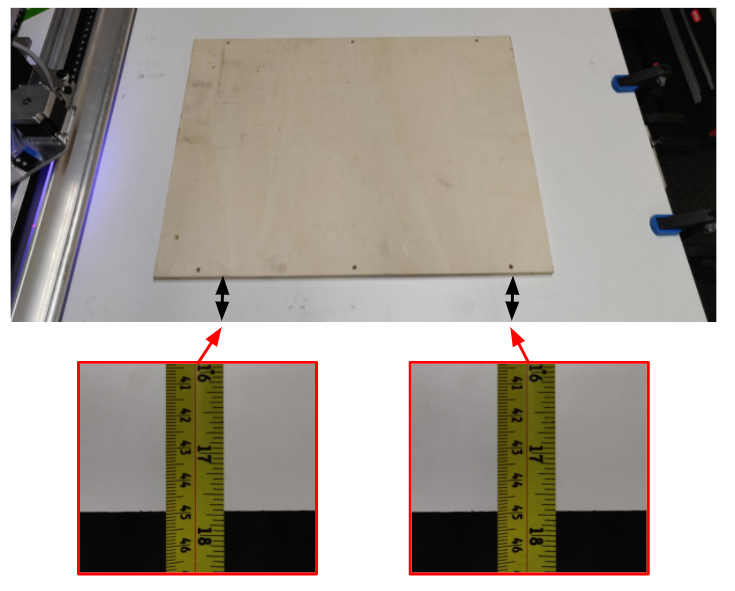
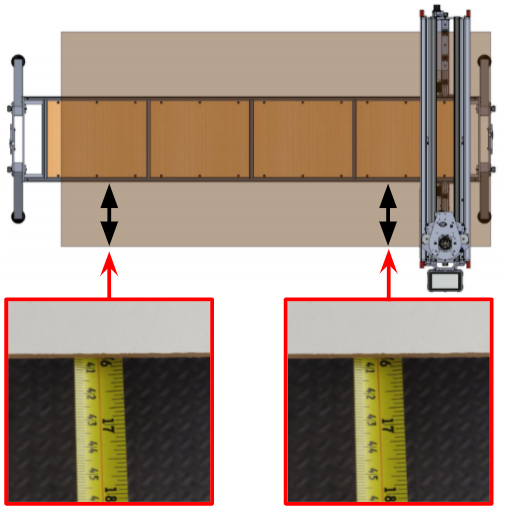
Then, use the Y axis edge of the spoilboard as your reference for aligning the stock material.
A: Spoilboard
B: Stock material
C: Y axis edge
M1 & M2: Measurement points
Option 2: referencing the Z Head
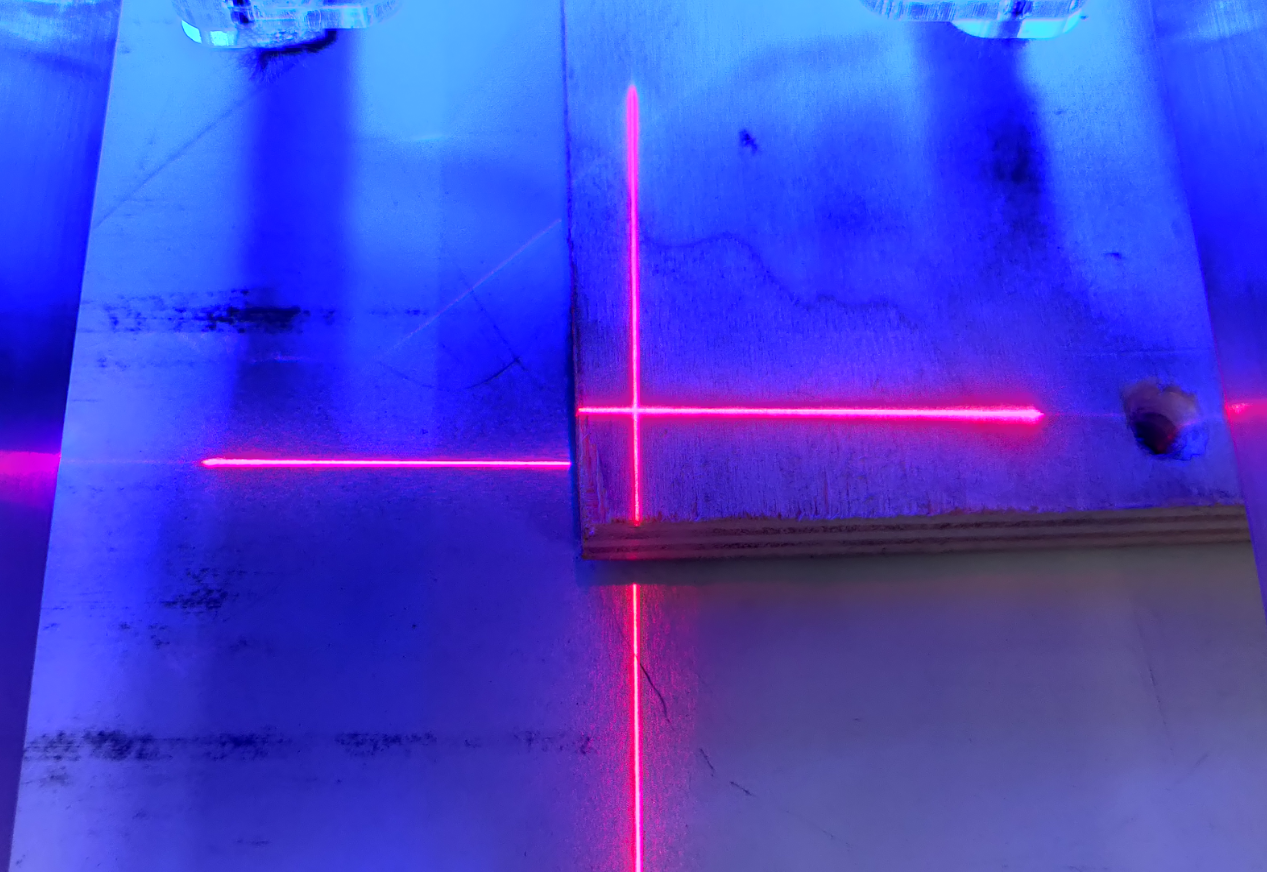
With SmartBench PrecisionPro, you can use the laser datum to align your offcut sheet material.
If there is no laser datum installed on your SmartBench, you can use the centre of the tool as a reference point. In the following pictures, we will demonstrate how to do the alignment with the laser crosshair.
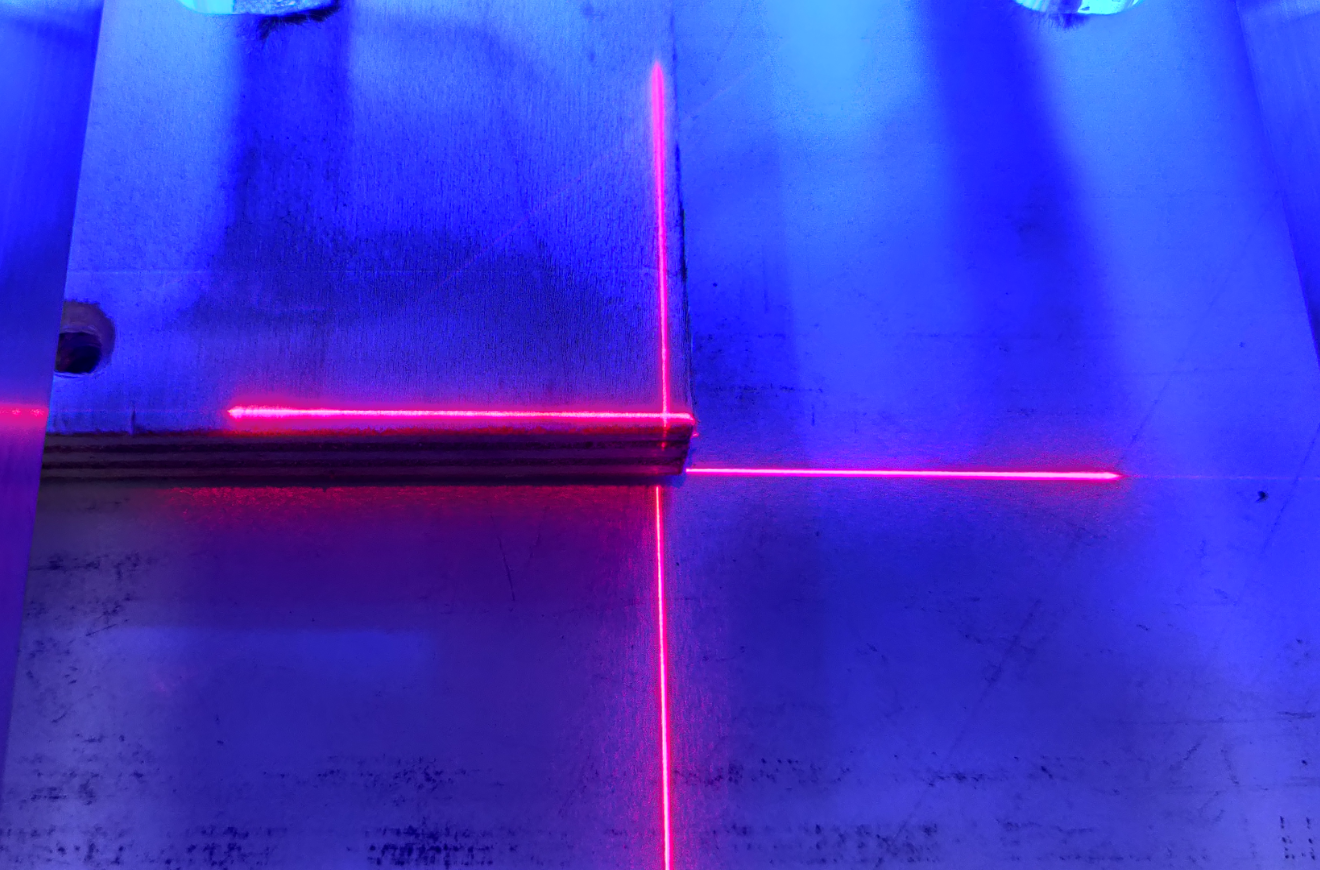
Align the laser datum crosshair or tool with one corner of the stock material.
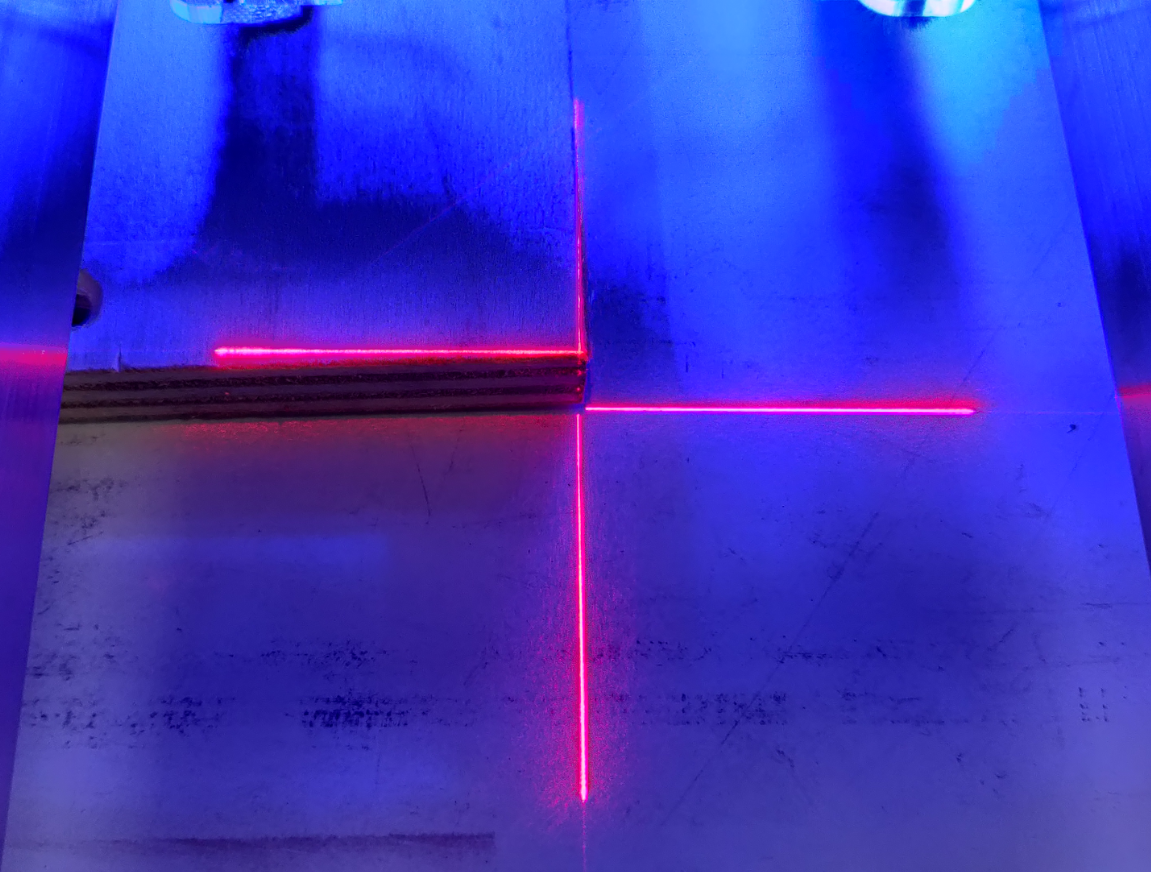
Move the Z Head along the longest side of the stock material to the opposite corner, and check the material positioning.
Adjust the positioning as needed.
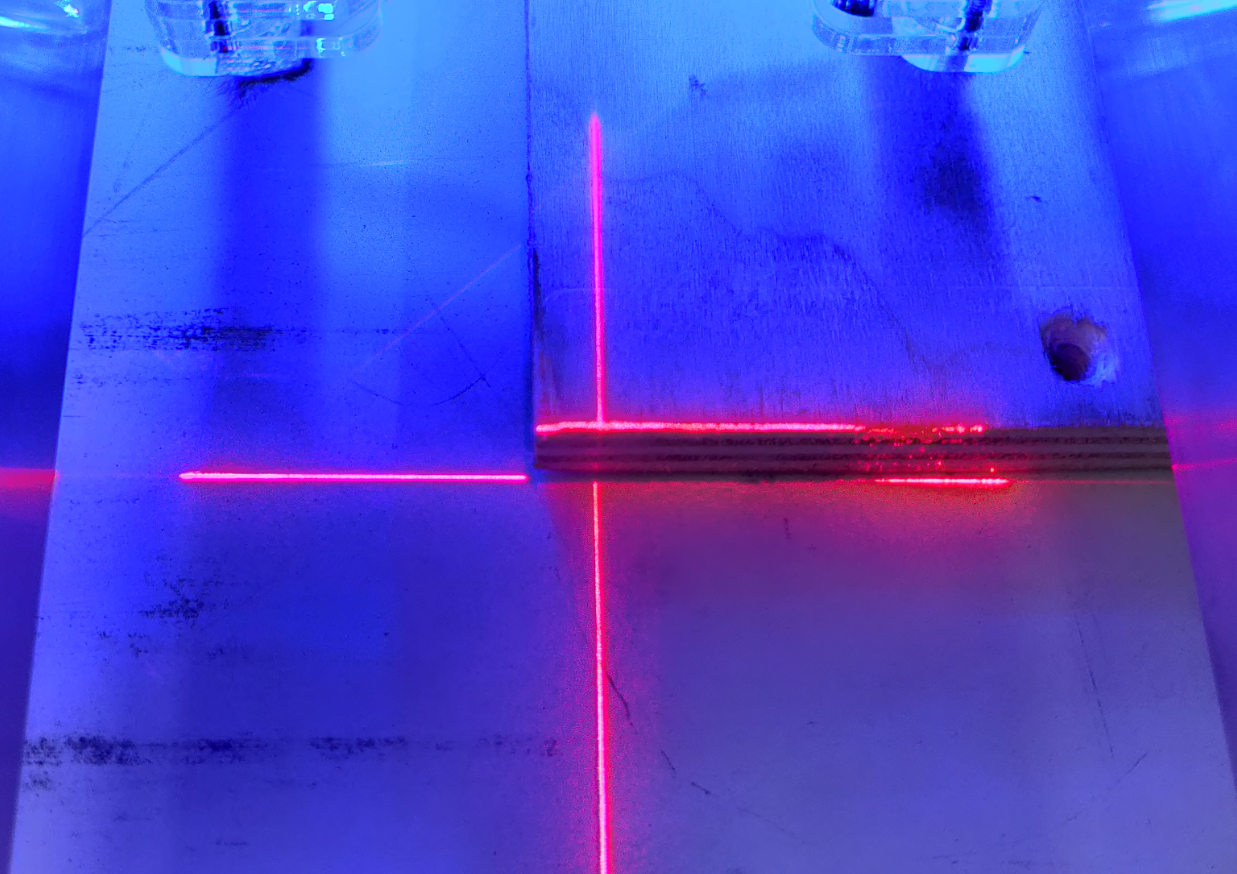
Move the Z Head back to the first corner and check the positioning again.
Repeat the procedure as needed, until both corners are aligned with the tool or laser.
Option 3: referencing the Y Bench
If you don’t use a spoilboard, align the edge of the stock material with the side of the Y Bench using the same tape measure technique as with a spoilboard.
Click here to learn how to position a spoilboard.
< Previous | List | Next >