This article gives a quick overview of the tool we will need for the first part of our job.
< Previous | List | Next >
|

|
Fitting a tool incorrectly can cause serious damage to SmartBench.
Click here if you get stuck at any point, or if you need more information about how to fit a tool correctly.
|
|

|
This article gives a quick overview of which tools we need for the job, and a brief summary of how to load them.
|
We will now need to fit the cutter used in the first job, which is a 90°, v-groove engraving cutter with a ¼” (6.35mm) shank. We will use a 7-6mm collet.
Click here to learn how to size the collet.
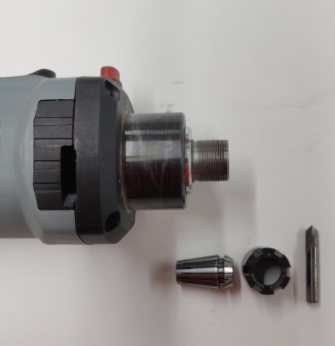
Load the collet into the spindle.
Click here to learn how to fit a collet into the spindle.
Load the cutter into the collet.
Click here to learn how to fit a tool into the collet.

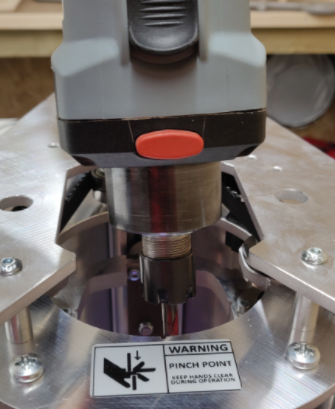
Put the spindle switch into the on position, and orientate the spindle so that the switch is facing towards the home end of the Upper X Beam. Load the spindle into the Z Head from above.
Adjust the position of the spindle motor to maximise airflow, tighten the clamping bolt, and plug the power and signal cables into the Z Head.
Click here to learn how to fit the spindle into Z Head.
< Previous | List | Next >