This article is about the importance of regular cutter checks.
< Previous | List | Next >
If a cutter is used for multiple jobs, we recommend checking it before every new job.
|

|
Using a blunt or damaged cutter will lead to a poor quality cut and overheating (which may damage the spindle motor).
|
In this article, we will show you examples of new and worn cutters. The images in this article were taken using a digital microscope.
You can check your cutters by inspecting the edges using a scope (A), or a jeweler's loupe (B).

Example: New sharp cutter
Firstly, we examine the cutting edge of a brand new cutter. In the image below you can see how sharp the edges are.
Example: Blunt cutter
The surface of the cutter’s material has no discolouration, but the cutting edge is rounded and may not be sharp enough to produce a quality finish cut during the next job.

The same cutter’s cutting edge on the second flute has obvious wear. We recommend replacing the cutter.

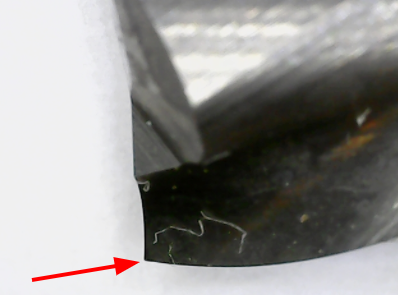
Example: Damaged cutter
The cutting edge of another cutter is damaged and the cutter must be replaced.
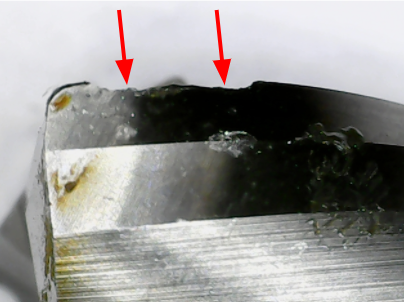
Example: Discoloured cutter
The cutting edge is still sharp, but discoloration suggests the cutter was overheated. This may lead to unexpected blunting of the cutting edge or even breaking during the next job. The cutter must be replaced.

< Previous | List | Next >