.
< Previous | List | Next >
To set up SmartManger, you need to setup all three packages:
Follow the instructions in the order presented below.
SmartBench Console setup
Install latest version of Console software
Your Console needs to be running version 2.0.0, or later (to learn how to update your console, click here).
Configure your SmartBench
Navigate to “System Tools”
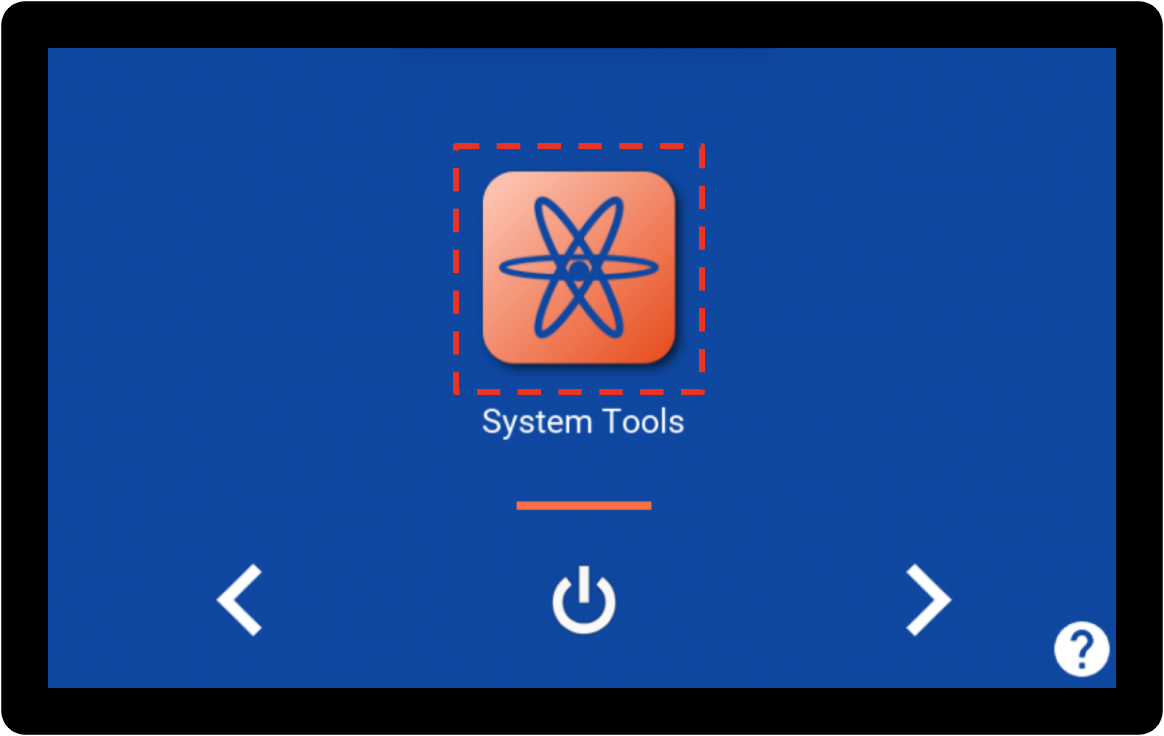
Select “System info”

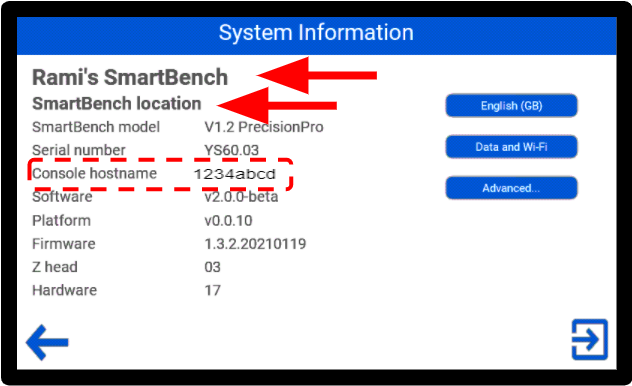
Configure the following items to enable your experience with SmartDashboard:
-
Click on the SmartBench name, and give it a personal name.
-
Click on SmartBench location, and give it a location.
-
Note your unique Console hostname. You will need this value to add the machine to your SmartDashboard when you register.
SmartTransfer Pro installation and check
Download
On your PC, download the install package from the link (provided in your email from your SmartManager purchase).
Install SmartTransfer Pro
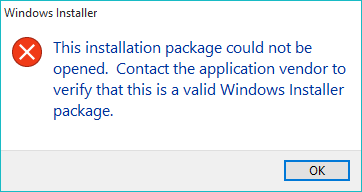
Run the install package.
If you see “installation package could not be opened”, click “OK” and re-run.
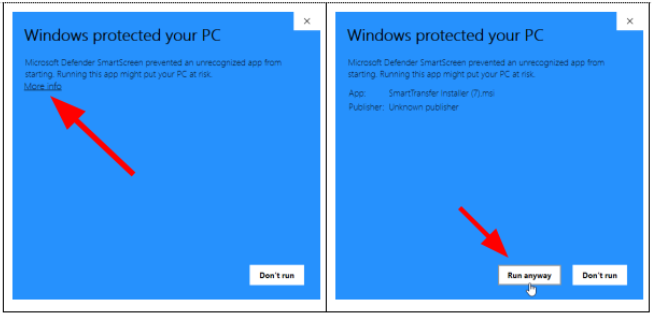
When you see a protection screen, click:
Run and check SmartTransfer Pro
After install, click Windows Start > Yeti Tool > SmartTransfer Pro
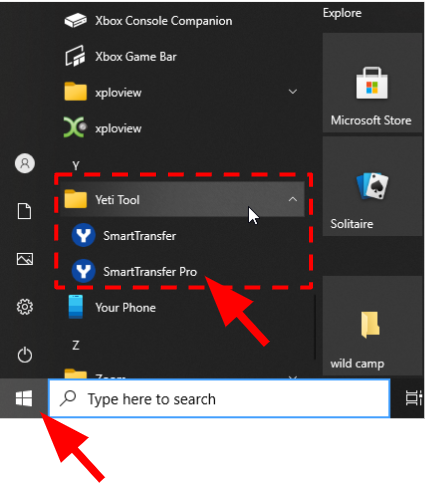
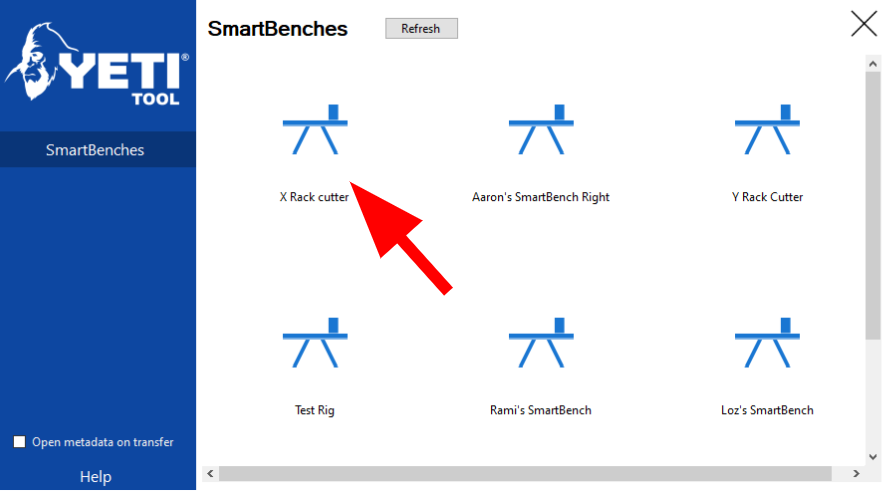
If your installation has been successful, you should see SmartTransfer display your SmartBench in the main window, and you should be able to double click on it to see the files.
SmartDashboard registration and orientation
Register
On a browser, go to: https://smartdashboard.yetitool.com/
Click Register as a new user
|

|
We recommend to use the following browsers for SmartDashboard:
|

Enter details
Enter your license key (provided in your email from your SmartManager purchase).
Add your first machine
After logging in for the first time, you will be prompted to add a machine on first login.
Input your SmartBench’s hostname shown on the Console (see previous section Configure your SmartBench).
Submit.
Add more machines
If you have the Multi licence of SmartManager and want to add more machines, click on the profile button (top right) > Add a machine
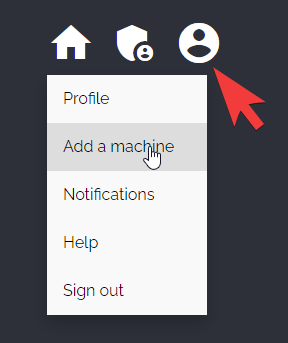
Repeat the steps above to add a machine.
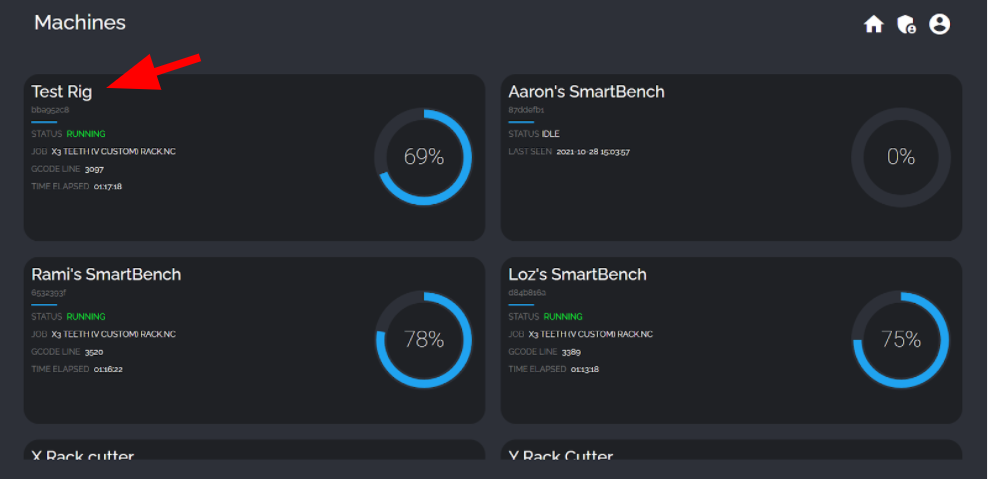
View all machines
Click on the Home button

View your machines status
You will now be able to see you machines presented in the Machines screen.
You’re done!
You are now ready to start using the SmartManager workflow.
< Previous | List | Next >