This article showcases a scenario of using an offcut for stock material.
< Previous | List |
What will we do?
In this example we will:
-
choose our spoilboard
-
position and align the spoilboard on SmartBench
-
lock spoilboard on SmartBench
-
position and align the stock material on SmartBench
-
lock both sheets on SmartBench using clamps
Choosing our spoilboard
We will use a large sheet of 9mm coated MDF material for our spoilboard.
Click here to learn what makes a good spoilboard.
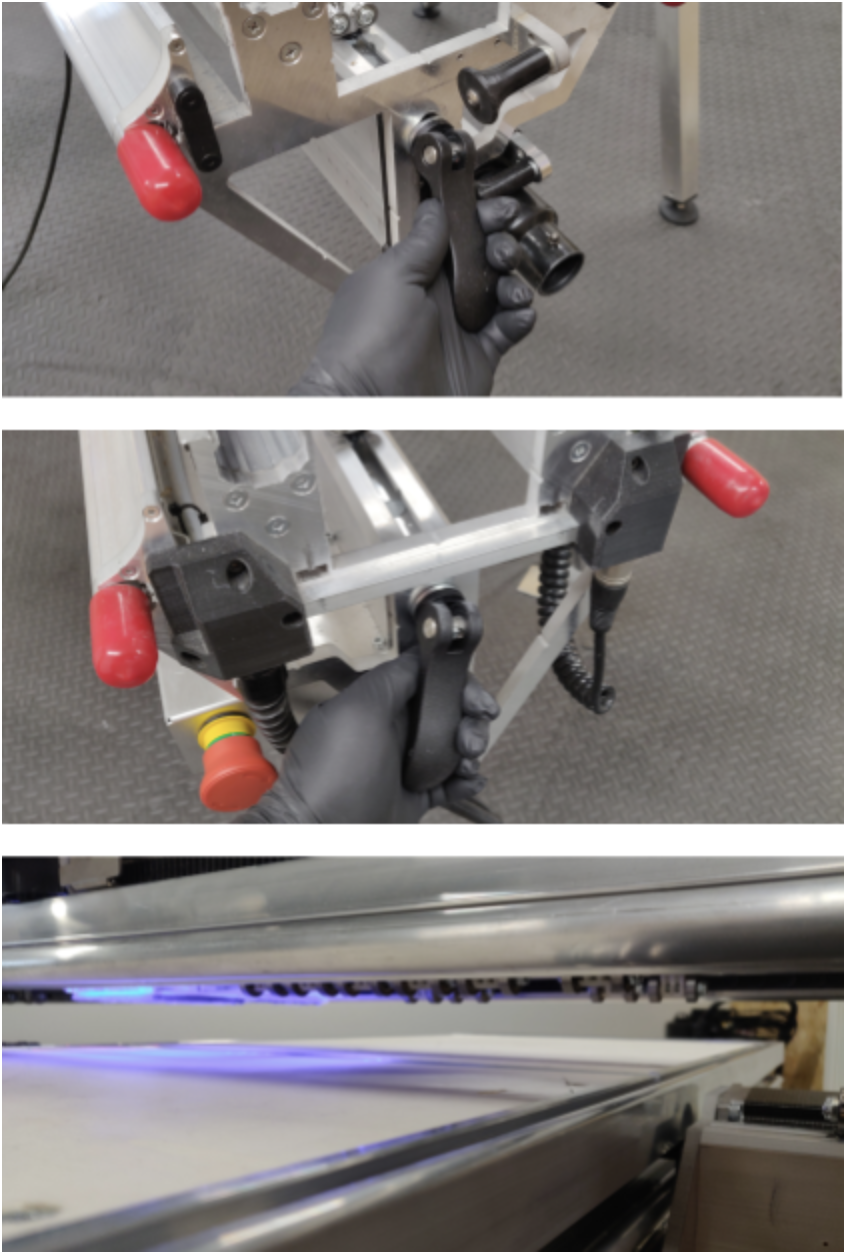
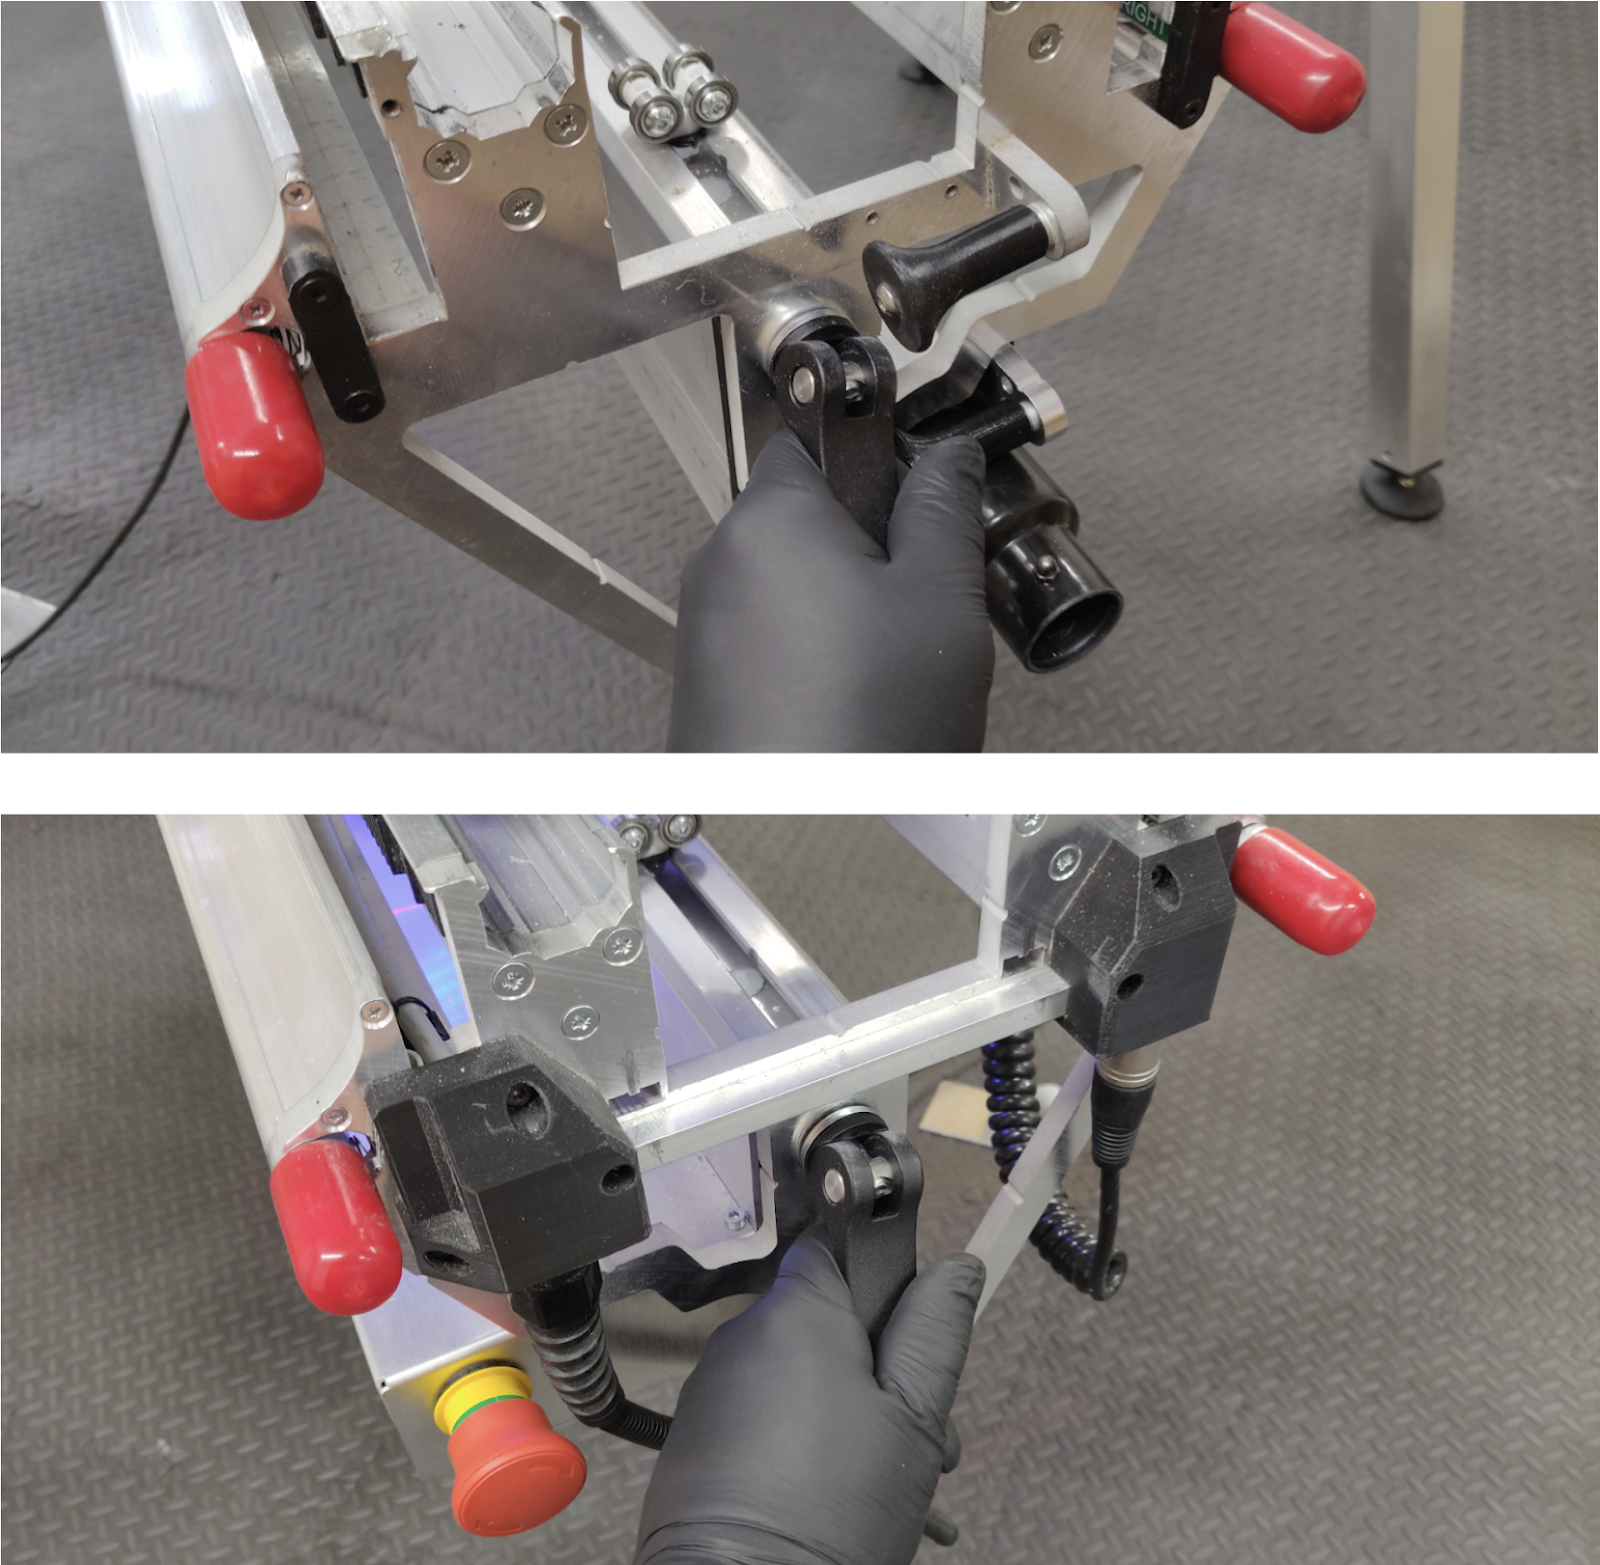
Raising the Upper X Beam
We will unclamp and lift up the Upper X Beam, ready to load our material.
Lift the Upper X beam above the Y Bench high enough to allow both spoilboard and stock material to freely move under it.
Positioning our spoilboard
Click here to learn how to position and align a spoilboard using the tape measure technique.

Locking our spoilboard
We will use speed clamps to lock our spoilboard on SmartBench.
Lock on leg plates at the home end of Y axis.

Lock on wheel tracks on the far end of Y axis.

Positioning our stock material
We will use an offcut of a 12mm plywood sheet and align it with the edge of the spoilboard along the Y axis.
Click here to learn how to position and align stock material.
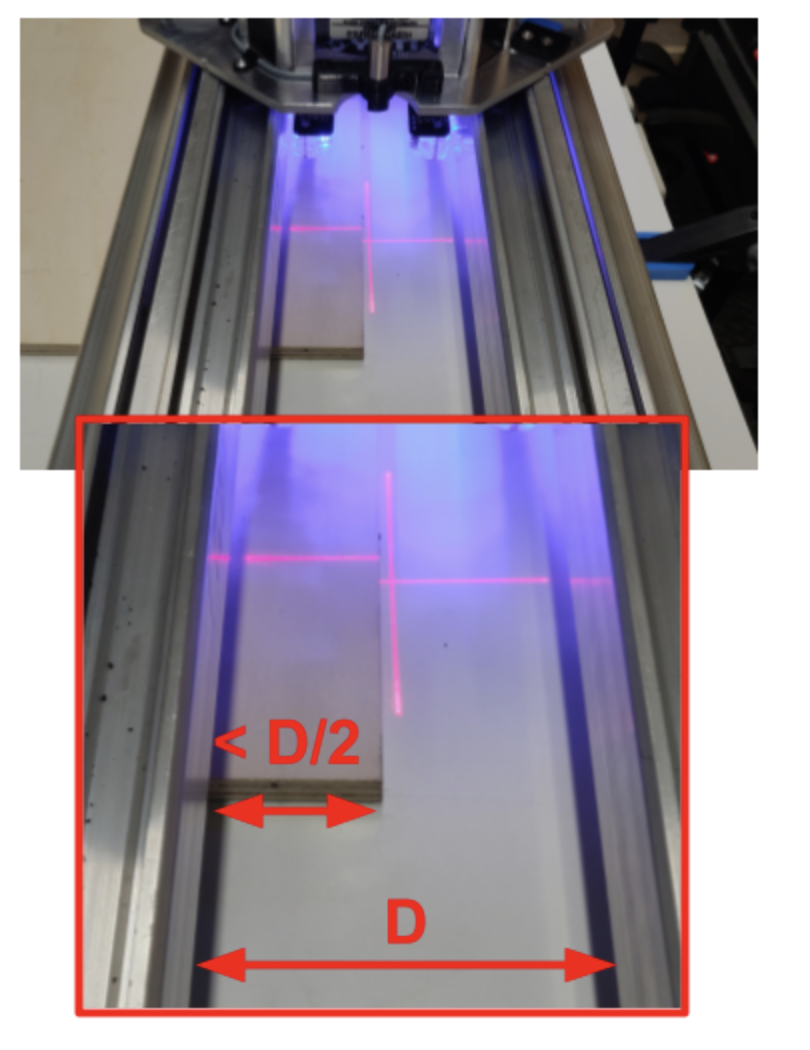
We need to make sure that the stock material is positioned away from the clamps used to lock the spoilboard.
Move the Upper X beam closer to the speed clamps holding the spoilboard, so there is a gap between the components of the beam and the clamps.

Position the edge of the stock material as shown in the diagram.
This will guarantee that the moving components of the SmartBench will not interfere with the speed clamps during the job.
Move the Upper X Beam towards the far end of the Y axis using manual moves, so that you have full access to the stock material.
The stock material needs to be square with respect to SmartBench (so that the job happens exactly where we expect - not at an angle that might run it off the stock).
Align the stock with the edge of the spoilboard using a tape measure. Measure the distance of the stock from the spoilboard edge at two points along the Y axis.
Adjust the position of the stock material until the measurements are the same.

Locking our stock material
We will use woodscrews to lock our stock material on the spoilboard.
We are using 12 mm stock and 9 mm spoilboard, so the total thickness is 21 mm. We will use 20 mm long wood screws to attach the stock to the spoilboard.
Attach the corners of the stock material to the spoilboard using the woodscrews.

Click here to learn how to lock offcut sheet material.
Lower and clamp the Upper X Beam
Adjust the rollers so that they will make full contact with the material as the beam runs along the Y axis.
When we lower the Upper X Beam, we need to ensure that the rollers are fully resting on the surface of our workpiece, with the full weight of the Upper X Beam distributed evenly through them.

Securely clamp the Upper X Beam onto the Lower X Beam, using the two clamp handles at each end of the X Beam.
< Previous | List |