How to install the first pair of legs on the Y Bench.
< Previous | List | Next >
You will need
Y Bench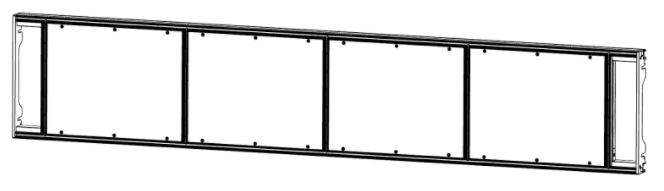
Pair of Legs (x1)
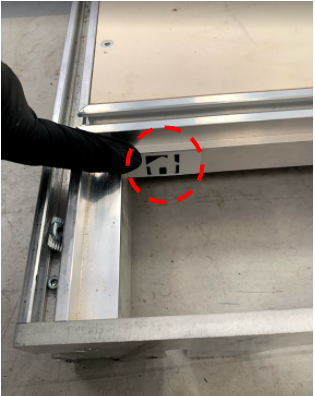
Identifying Home and Far End locations
The Home end is marked with a Home symbol. Start with identifying the Home end of the Y Bench by looking for the Home symbol.
The far end has no marking as illustrated below:
Assembling a leg set at Far End
Fit a pair of legs by first unfolding the legs.
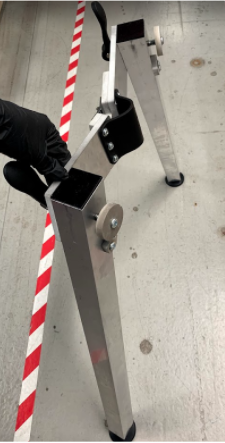
Keep the clamp handles in an upright (unlock) position like this:

The clamp handles are unlocked when they are in an upright position.

And are locked when they are pointing at an angle

Lift the FAR end of the Y Bench.
|

|
Double check that this is definitely the FAR end when you lift it - starting with the wrong end will cause problems in later steps.
|

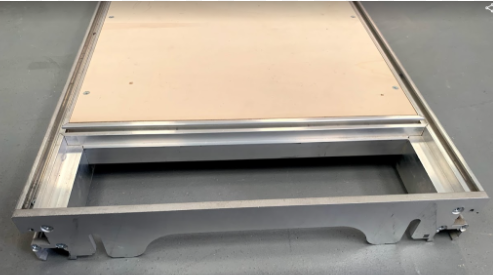
Align the clamping bolts of the Legs with the slots in the Y Bench end plate.
A: Slots in the Y Bench
B: Leg clamping bolts
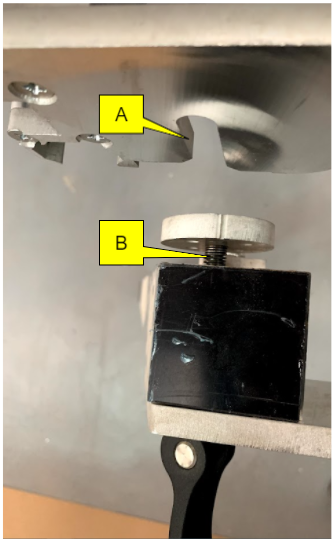
Slide the Leg clamp bolts into the slots in the Y Bench end plate like this:

It is important that the Legs are correctly positioned inside the Y Bench slots at the exact moment that the clamps are locked in place.
Do not push the clamp handles down just yet - pay close attention to the next steps, as you will need to lift the whole assembly in a specific way whilst locking the legs into place.
|

|
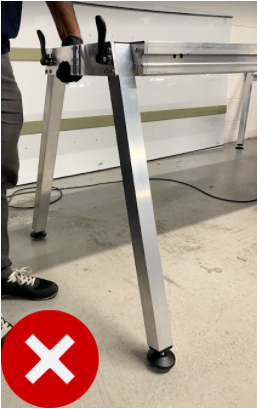
Locking the clamp handles without lifting the assembly in the proper way will result in the legs being fitted at an angle. This will make the whole assembly unstable, and cause problems during machining.
|
Lift the end plate of the Legs, high enough that the feet are completely lifted off the ground.


Keeping the whole assembly lifted, push the handles down.
|
|
Do not twist the handle as this will change the clamping settings.
|


The clamp handles will close at an angle (as shown below) when they are tight. This is to enable easy access to unclamp.
Lower the assembly to the ground, so that the feet are resting on the floor.
Great, you have installed the first pair of Legs!

< Previous | List | Next >