This article explains the purpose of using tabs in a job, and how best to use them.
< Previous | List | Next >
Imagine the following scenario. You have a sheet of stock material locked to a spoilboard, which, in turn, is attached to the Y Bench. Most likely, the stock material is locked to the spoilboard in just several points; as long as it is a single piece of material, it will not move.
You are cutting a closed contour shape. Once the cutter breaks through the thickness of the material and completes the contour, the piece will not be attached to the material anymore.
If you have more routing to do within the contour, you will be working on a piece of material not locked on the spoilboard and able to move!
What is a tab?
A “tab” is a feature generated by CAD/CAM software and embedded in the toolpath. It keeps the finished piece of a job attached to the stock material, so it cannot move or bend.
After the job is finished, the tabs can be cut or broken.
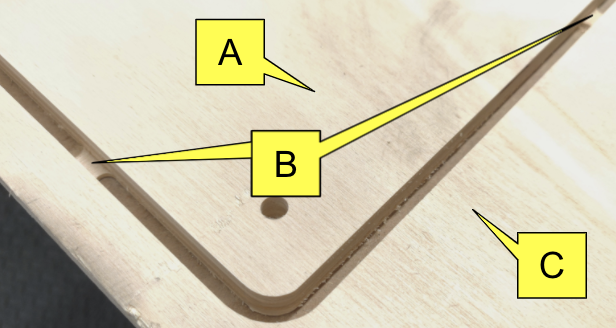
A: Finished piece.
B: Tab.
C: Stock material.
How do I create a tab?
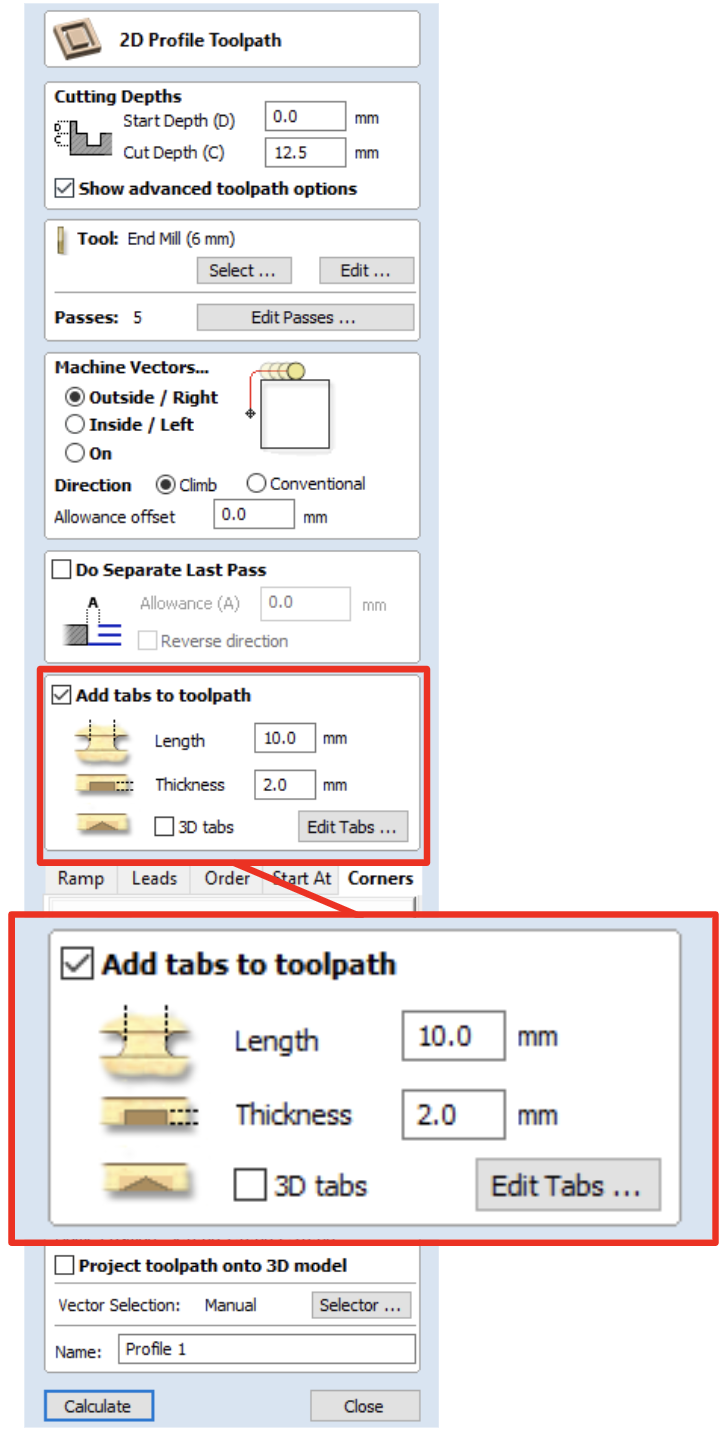
CAD/CAM software gives you the option to add tabs to the contour cut toolpath. For example, in Vectric VCarve you can set up the size, the number and location of the tabs.
After the contour is finished, the piece will stay attached to the stock material throughout the job. After the job is completed, the tabs can be broken.
How do I break a tab?
Depending on the material, you can use:
What else do I need to know about tabs?
When creating tabs, keep the following in mind:
-
Create as few tabs as possible; less tab breaking to do after the job is finished.
-
Do not create tabs in the corners and, if possible, avoid radiuses. If tabs are positioned on the straight segments of the job, it will be easier to cut and finish them.
-
Create small tabs when possible. It is easier to break smaller tabs, but you need a bigger tab to hold a bigger piece of material.
-
Align the tabs perpendicular to the grain of material. The tabs will be stronger, but easier to cut.
< Previous | List | Next >