This article will show you how to set SmartBench’s working datum and position the job file in the XY plane.
You will need to set the position of SmartBench’s working datum in the XY plane and the Z axis separately.
|

|
Once you have set SmartBench’s working datum in the X, Y, or Z axis, SmartBench will remember the position on that axis until you change it.
You can move SmartBench away from the position of its working datum without needing to reset it again before starting a job.
|
Preparing to set SmartBench’s working datum
You will need to know what a datum is, and how to home and move SmartBench before you can set SmartBench’s working datum.
Click here to learn more about what a datum is. Click here to learn more about manual moves. Click here to learn more about homing SmartBench.
In the Console menu, click on the “Pro” App.

If SmartBench is not homed already, home SmartBench now.
|

|
Setting SmartBench’s working datum without homing first could cause the job to run in a place you did not expect, and cause damage to the workpiece.
|

Click on the manual move tab on the left hand side of the Console screen.

Setting SmartBench’s working datum in the X and Y axes at the same time
You can set SmartBench’s working datum in both the X and Y axis at the same time.
A: Target datum position

Using the laser datum to set the working datum position
If you have not already, you will need to have set your laser datum offset. If you’d like to learn how to do that, please click here.
Using the manual move buttons, align the laser crosshair with your chosen position for SmartBench’s working datum.
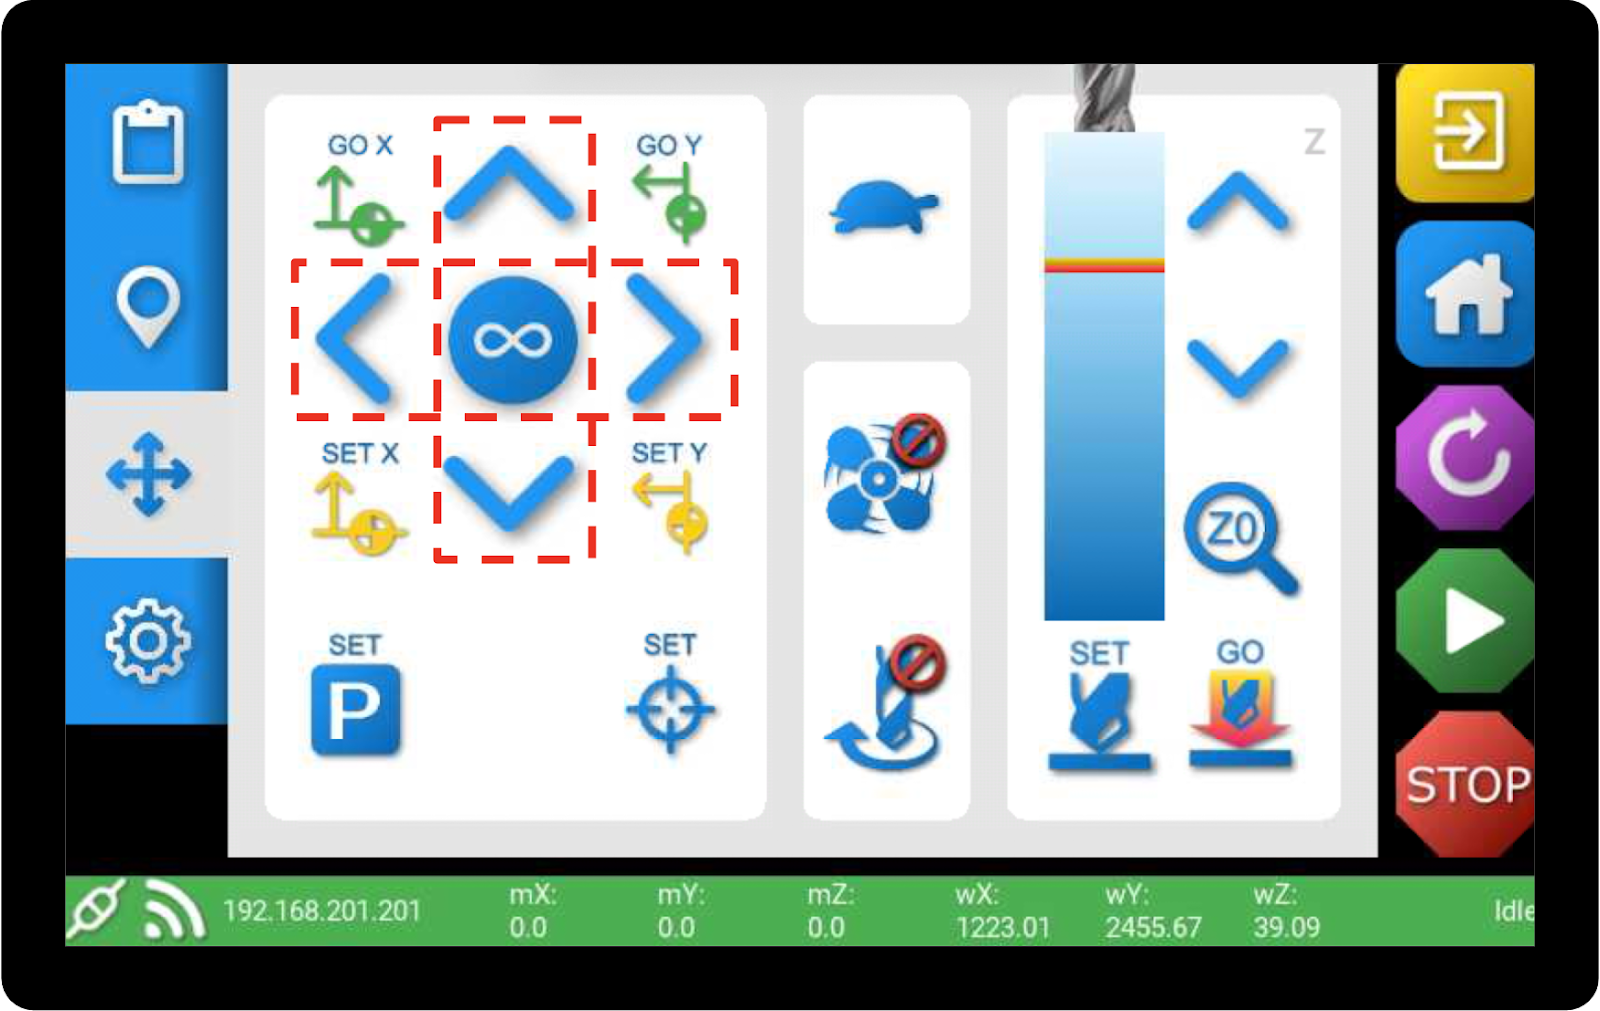

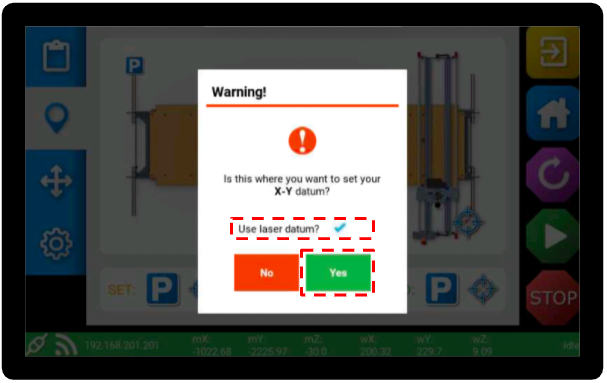
When you are happy, press the SET datum button in the bottom middle of the Console screen.
This sets SmartBench’s working datum to this location in X and Y axes simultaneously.


Check the “Use laser datum?” checkbox, and press “Yes”.
|

|
The machine will position the tool over the point where the laser crosshair was. This is a good time to check that the tool is where you need it to be.
|
Using the tool center to set the working datum position
If you are using the tool as your reference point (as opposed to the laser crosshair), you may want to lower the tool closer to the material surface using the Z axis controls.

Position your cutter over the point that you want to position SmartBench’s working datum, using the XY manual move buttons.
Once you are happy with the position, press the SET button on the Console.
Press Yes to confirm your choice.

If you have the laser datum enabled, but would prefer not to use the laser on this occasion, uncheck the checkbox and press “Yes”.

Setting SmartBench’s working datum in the X and Y axes individually
There are times when you may want to set the position of SmartBench’s working datum in one axis at a time.
You can use either the laser or the tool to position SmartBench’s working datum, confirming in the same way as you did when positioning SmartBench’s working datum in both axes simultaneously.
Setting SmartBench’s working datum in only the X axis
On the manual move tab, select the “SET X” button.

Setting SmartBench’s working datum in only the Y axis
On the manual move tab, select the “SET Y” button.

Checking the working datum position
You can check the working datum position, and make sure that the job file is within SmartBench’s workspace by looking at the map tab on the Console. Here you can see:
A: The footprint of the job file in the XY plane.
B: Job file datum and SmartBench’s working datum aligned.

Move SmartBench to the position of its working datum
Move SmartBench back to the position of its working datum in any individual axis by using the “GO” buttons on the manual move tab.

Or, move SmartBench to the position of its working datum in the XY plane by using the “GO” datum button on the map tab.

< Previous | List | Next >