This article will show you how to send your files to SmartBench using the SmartTransfer app.
< Previous | List | Next >
Open the app
To open the program press the Windows key on your keyboard and begin searching for “SmartTransfer” until you find it in the list.
Click on the icon to open it.

Set the default gateway on latest versions
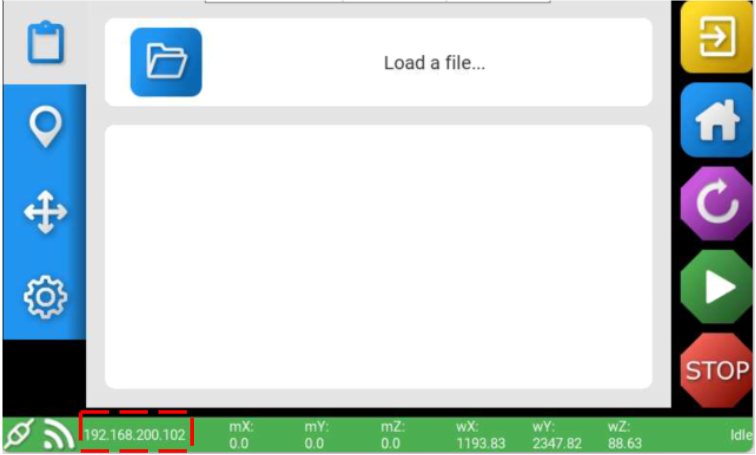
Select your default gateway in the dropdown box in the help section to match the first three sections of your console IP address. In this example the console has an Ip address of 192.168.200.102 so we need to select a default gateway of 192.168.200 in the Smartransfer default gateway dropdown box.
The console ip address can be found either in the Wi-Fi application or the main
Pro application
Set the default gateway on version 2.0.1.6 and earlier only
To set your Default gateway in Smart Transfer, enter the first three sections of numbers from the console IP address without a full stop at the end.
This is accessed through the (?) button in the top right corner of Smart Transfer. The IP address of the console can be found in the CAD/CAM app.
See the example below


Scan for SmartBenches
When you have setup the default gateway, and you scan - When the application has finished scanning, it will show you all the SmartBenches it has found.
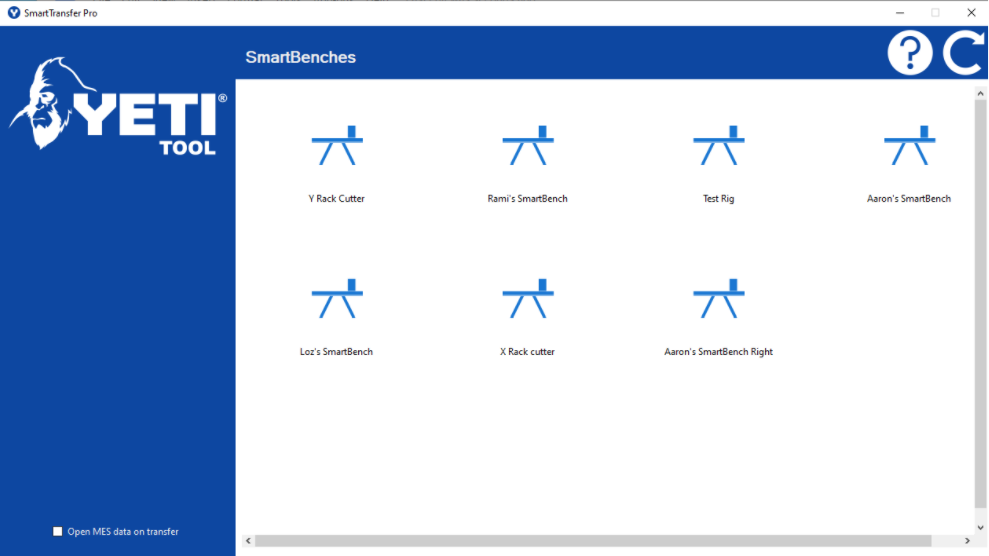
If you want to add a new SmartBench to SmartTransfer application then click on the refresh icon on the top right corner.

Transfer a file
Double click on the bench that you want to transfer your job files to (click here to learn how to personalise the name for you SmartBench).
You have two options either by drag and drop or add a new file or folder to the bench on the filechooser view.
Drag and drop
This will open a window that you can drag and drop your files into.
|

|
You can drop entire folders or multiple selected files into the SmartTransfer app. Any folder structure will be maintained.
|
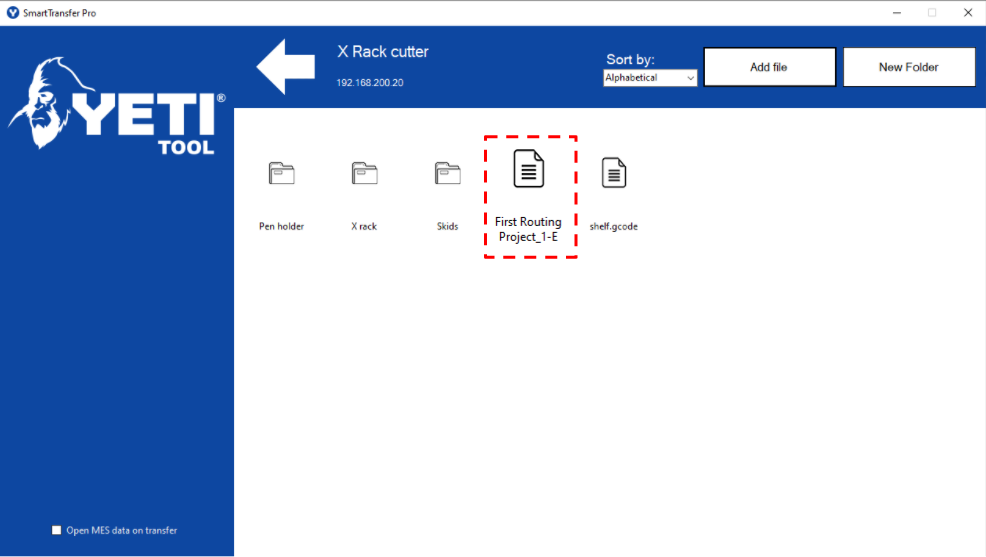
For example here we will use an “X Rack Cutter” bench to transfer a job file.

When you click on the “X Rack Cutter” bench you will see the interface as shown in the image.

As an example, we will drag and drop a job file into the “X Rack Cutter” bench.

A dialog box will show the status of the transfer, here it is successfully transferred click “ok”.
|
|
Please wait while the file is transferred to SmartBench.
|

Your new job file will appear on the interface, an example of a job file “First Routing Project_1_E”.

Add file
This gives you the option to add a file by going to its specific file location.
|
|
You can add entire folders or multiple selected files into the SmartTransfer app. Any folder structure will be maintained.
|
For example here we will use an “X Rack Cutter” bench to transfer a job file.

When you click on the “X Rack Cutter” bench you will see the interface as shown in the image. On this filechooser view click on “Add file”.

This will open a dialog box from where you can select the file location that needs to be transferred.

A dialog box will show the status of the transfer, here it is successfully transferred click “ok”.
|
|
Please wait while the file is transferred to SmartBench.
|

Your new job file will appear on the interface, an example of a job file “First Routing Project_1_E”.
File organisation using SmartTransfer
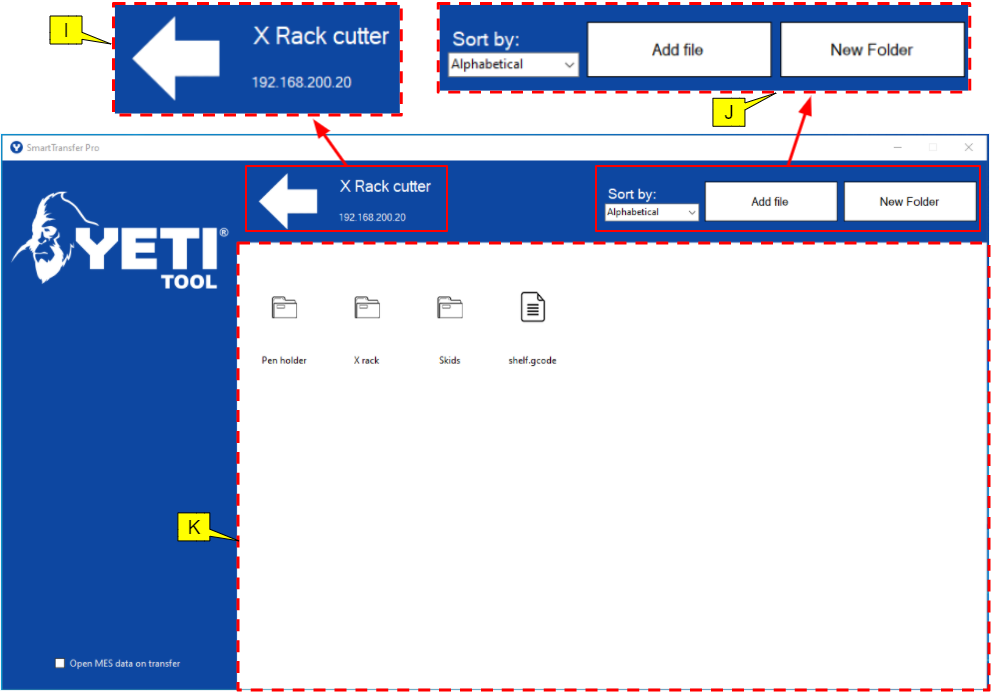
On this filechooser view, you will have the following options:
I: Name of the bench you are using, its IP address and click to go back arrow which will bring you to the main application interface from where you can select your SmartBenches.
J: You have the option to sort the files in either in alphabetical or date created order, add a new file or folder to the bench
K: Here you will see what existing or new job files you have, you can also drag and drop your job file to this panel
If you right click on the job file you get options such as:

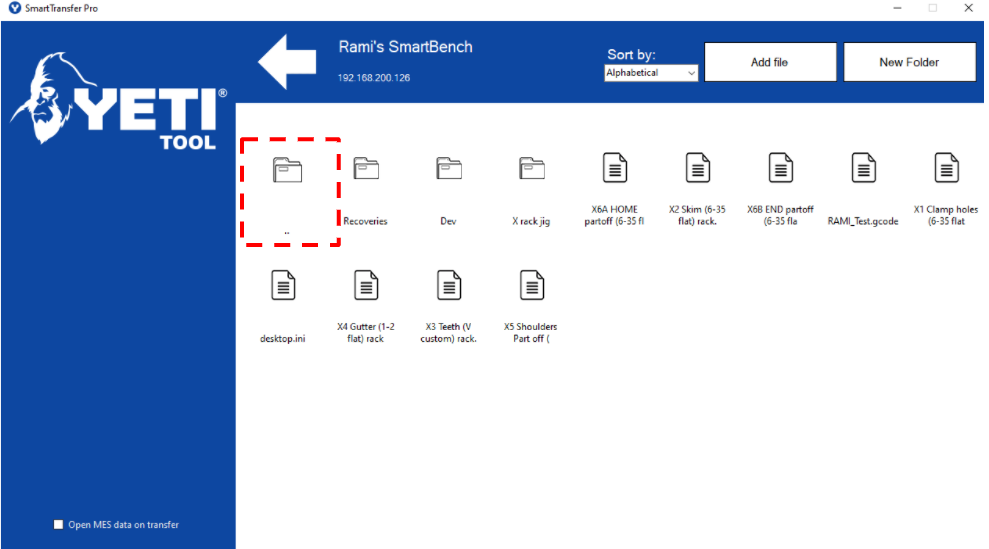
When you are in the folder of a SmartBench, use the folder highlighted as an action to go backwards.
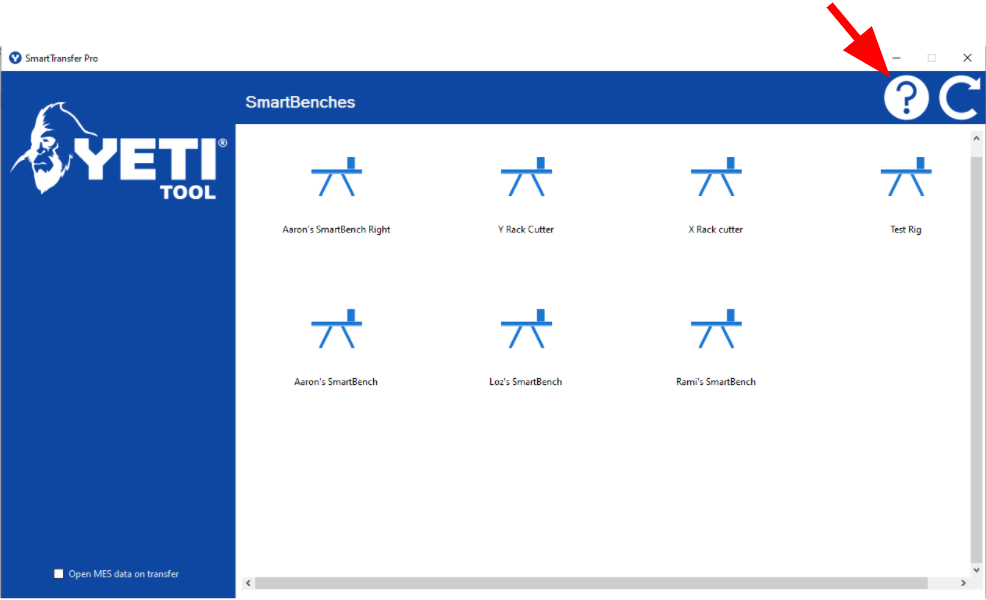
Help
If you need any assistance in using the SmartTransfer application then click on the help icon on the top right corner.
On the help interface you have the following options:
C: Change the language of the application
D: Close or hide the help interface
E: Visit our Knowledge Base which is full of abundant information
F: Submit a support ticket
G: Generate log file to help diagnosing any issues
H: Your SmartTransfer application version

< Previous | List | Next >