If you have been informed of a faulty or corrupted micro SD Card this is how to replace it
This guide is only for console serial numbers (CS2054 -> CS2416)
The console serial number is located on the back of your console.

(Pre-reading) The Console contains a small computer that is constantly carrying out background processes, and sending or checking information in its memory while it is on.
Powering SmartBench off using the main power button before turning off the console risks interrupting one of these processes, which then causes errors in what is saved to memory.
|

|
To avoid the need to repair your software in the future, or further damages to the console memory, it is recommended that you follow the below proper shutdown procedure for SmartBench rather than using the Red E-Stop Button
|
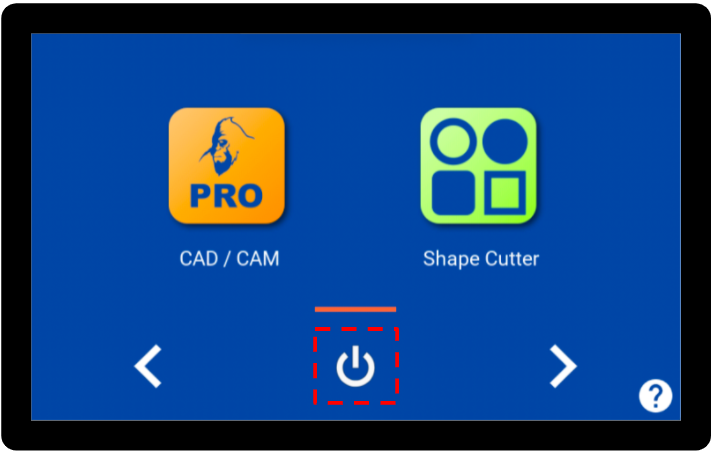
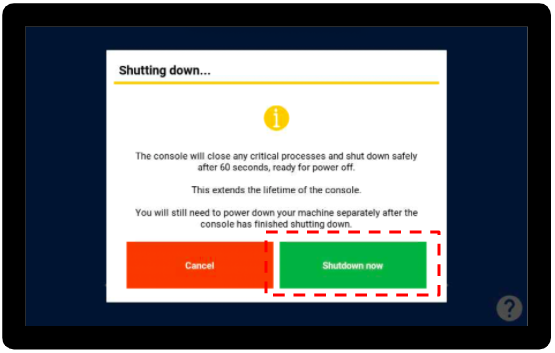
|

|
Note this will reset everything on your console back to its default:
-
So if possible ensure you have all the files you need
-
You are aware of your current brush hours in the maintenance application
-
Remember to reset you laser datum offset if you have this feature installed (Link here for guidance)
|
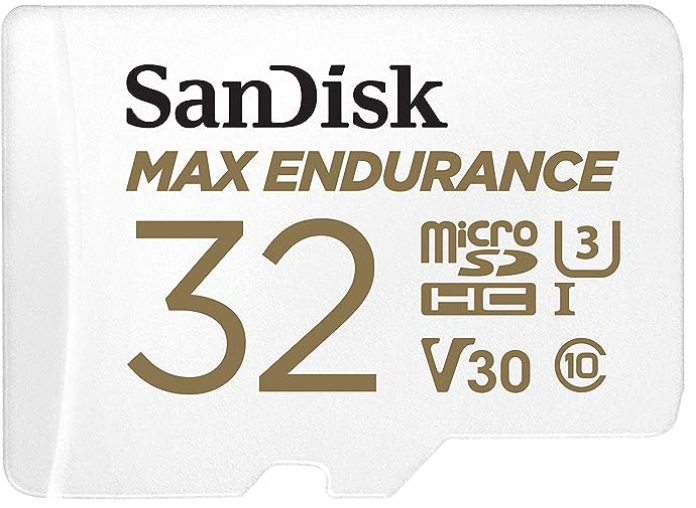
Step 1) Picking a Micro SD Card
Although any Micro SD card (or reflashing the faulty one in your console currently) could work temporarily:
We strongly recommend using these SanDisk Max Endurance 32GB micro SD cards for consoles as they have the best tested longevity and performance and enough storage for future updates.
Link to one for reference on Amazon
Step 2) Connecting the Micro SD Card to your computer
Connect the Micro SD card to your computer. If your computer does not have a Micro SD card slot you can use a Micro SD to SD card adaptor or a Micro SD card to USB adaptor.
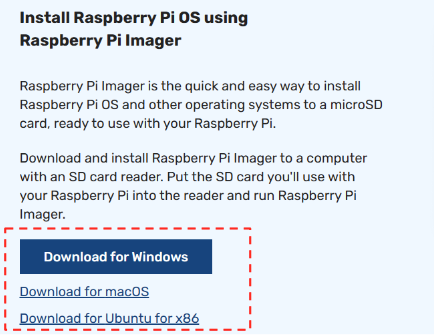
Step 3) Install flashing software
Install the Raspberry Pi Imager program
You can download it directly from here (it is free to use and download)
Download it and go through the standard install process:
Step 4) Downloading the new console software
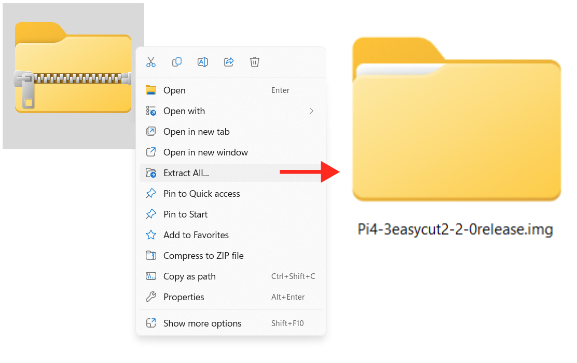
Download the image file on google drive and unzip/extract all of it
Step 5) How to flash the required image
Connect the new micro sd card to your computer
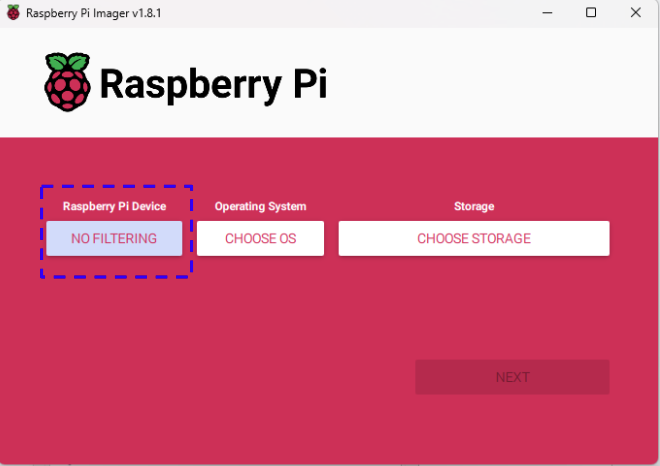
Choose “No Filtering” as the first option
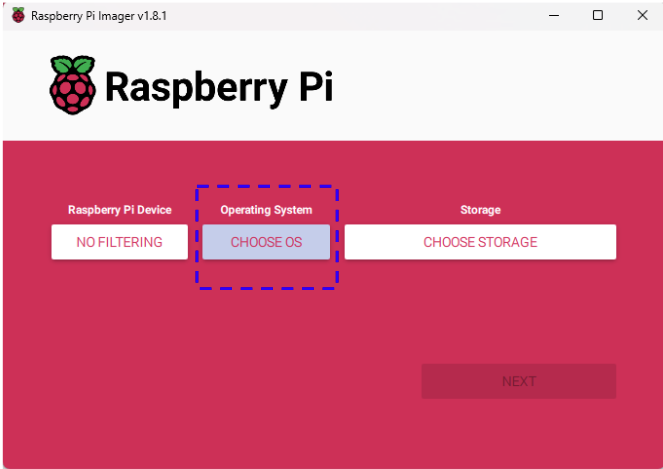
For the ”Choose OS” option select “Use custom” this option is usually located at the bottom of the list
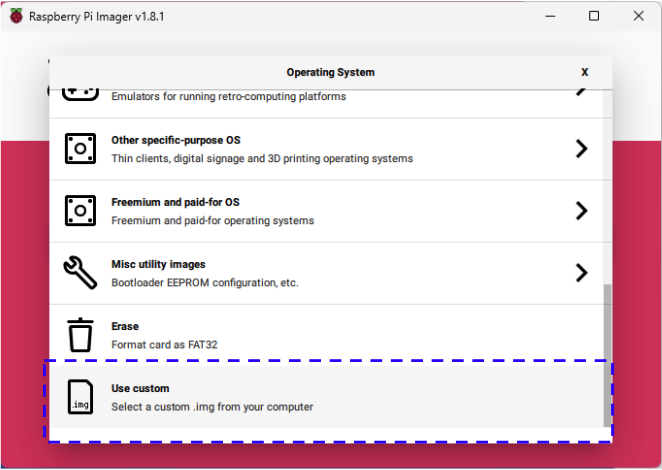
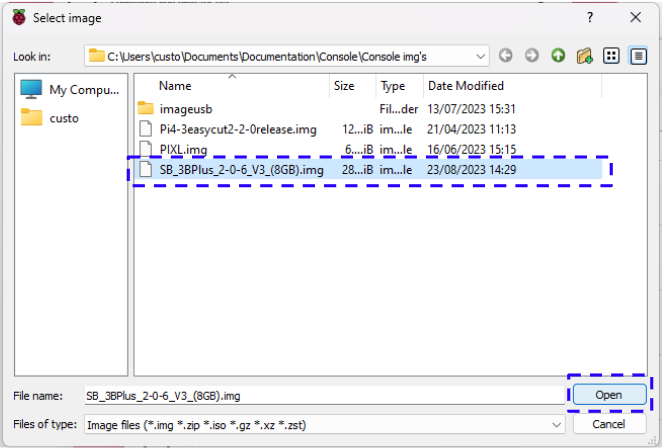
Navigate to your downloaded image from step 4, select it and click on Open
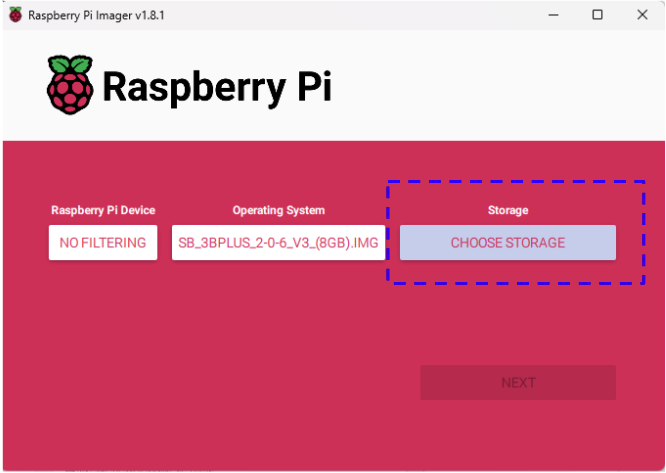
Then click on Choose Storage
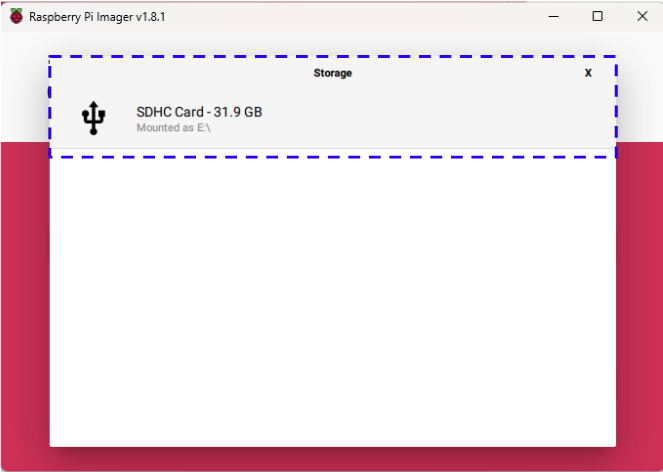
Select the connected card
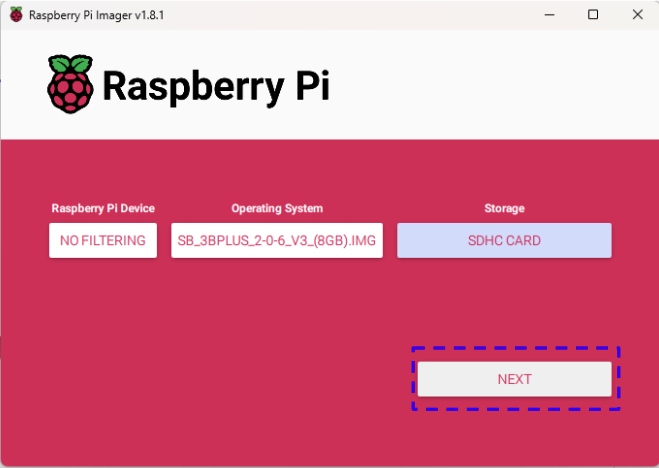
Then once everything has been setup click on “Next”
Select “No”

Select “Yes”

Depending on the version you may have a windows explorer window pop up saying no disk connected you can close this window.
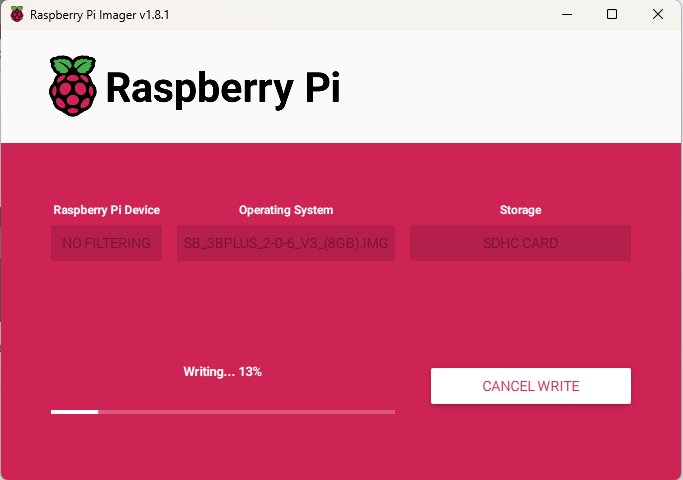
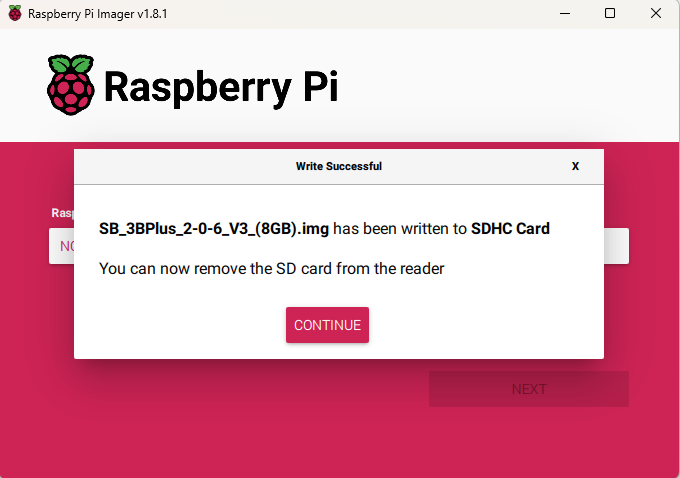
Wait for it to Write:
Remove the Micro SD Card from your computer
How to Replace the SD Card in Your SmartBench Console
|

|
As with any electrical items, all work you carry out on SmartBench should be performed in a clean environment to avoid any debris getting into components and potentially causing damage.
|
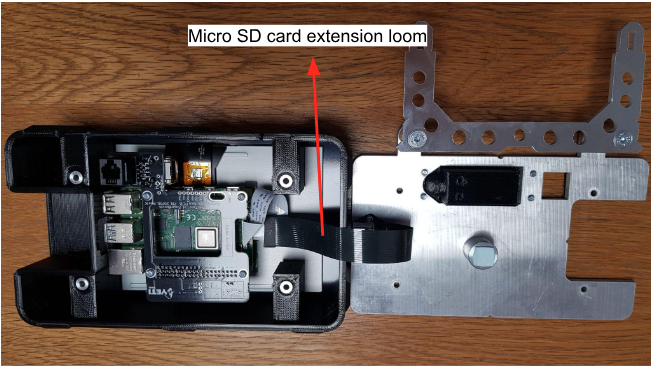
Step 1) Micro SD card extension loom removal
Your console also contains a Micro SD card extension loom between the Pi and the outside of the case. We recommend this is removed completely.
Once the console is removed from your Smartbench and in a suitable position - start by loosening the two PZ1 screws holding the cable strain relief clamp in place.

Now the screws are removed you will be able to lift the cable strain relief clamp out to reveal the connector.
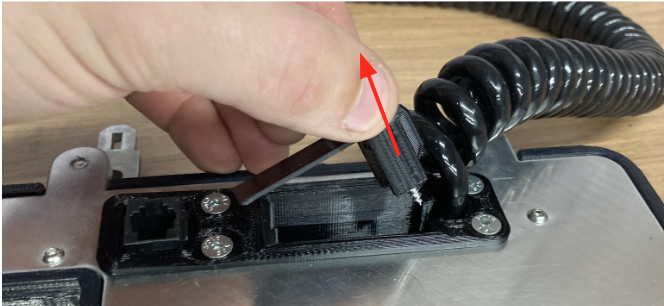
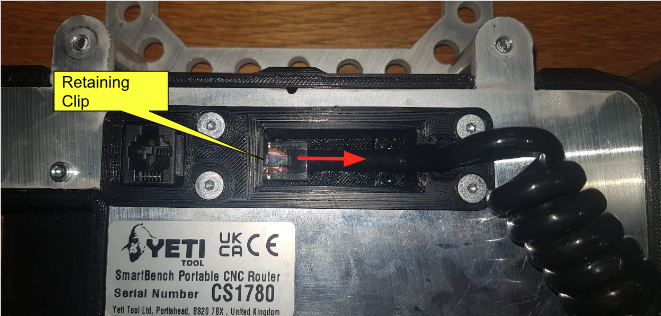
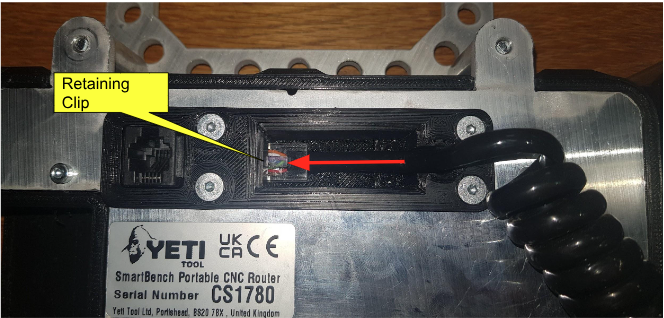
To remove the cable simultaneously press down on the retaining clip and pull the cable out.
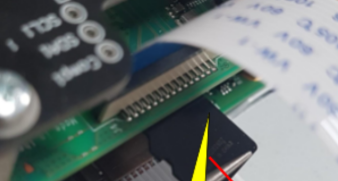
Step 2) Micro SD card removal
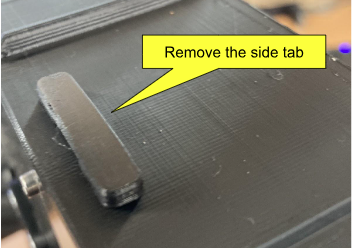
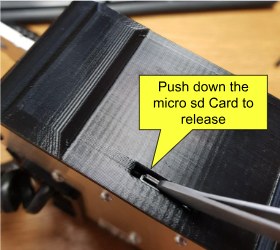
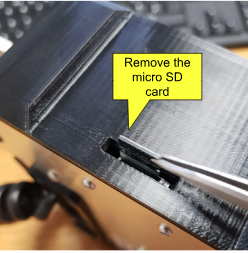
Remove the faulty micro SD card by removing the cover plate and using tweezers remove the SD Card
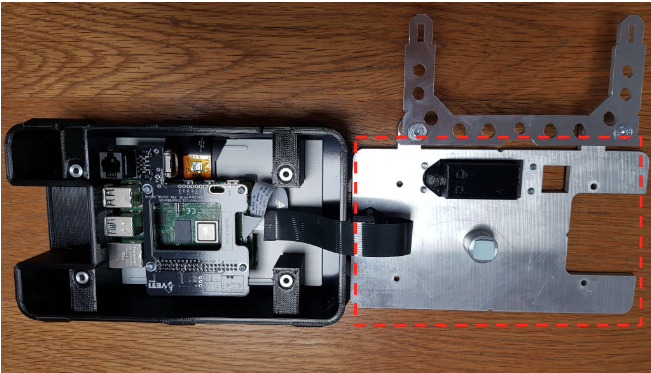
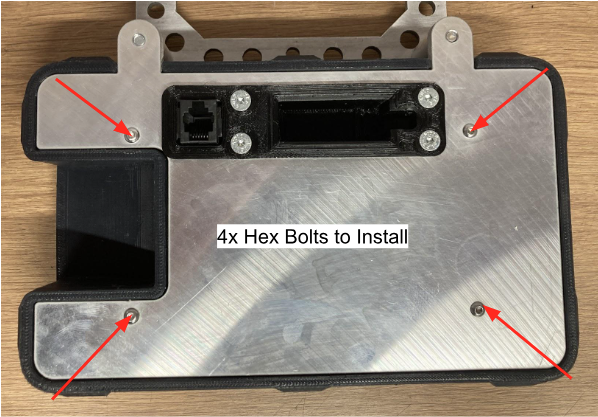
Step 3) Console backplate removal
Next, remove the four screws with your 2mm Hex Driver.
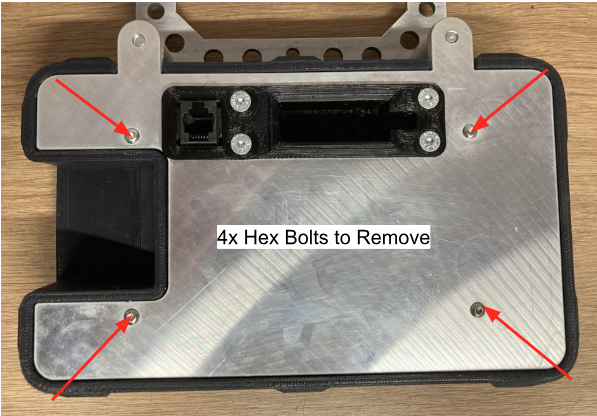
After the bolts have been removed - remove the back plate by lifting it upwards and placing it to the side. Unplug the micro SD card extender by pulling it outwards
Note: It can take a little force to remove the console backplate
Step 3) Removal of micro sd card extension loom
Unplug the micro sd card extension loom labelled above this may be hot glued into place and can require a little force in unplugging.
This can either be fully removed off of the console backplate if you have a 5mm spanner and a 1.5mm hex driver to remove the 2x bolt’s and the 2x nut’s or taped out of the way as per the below.
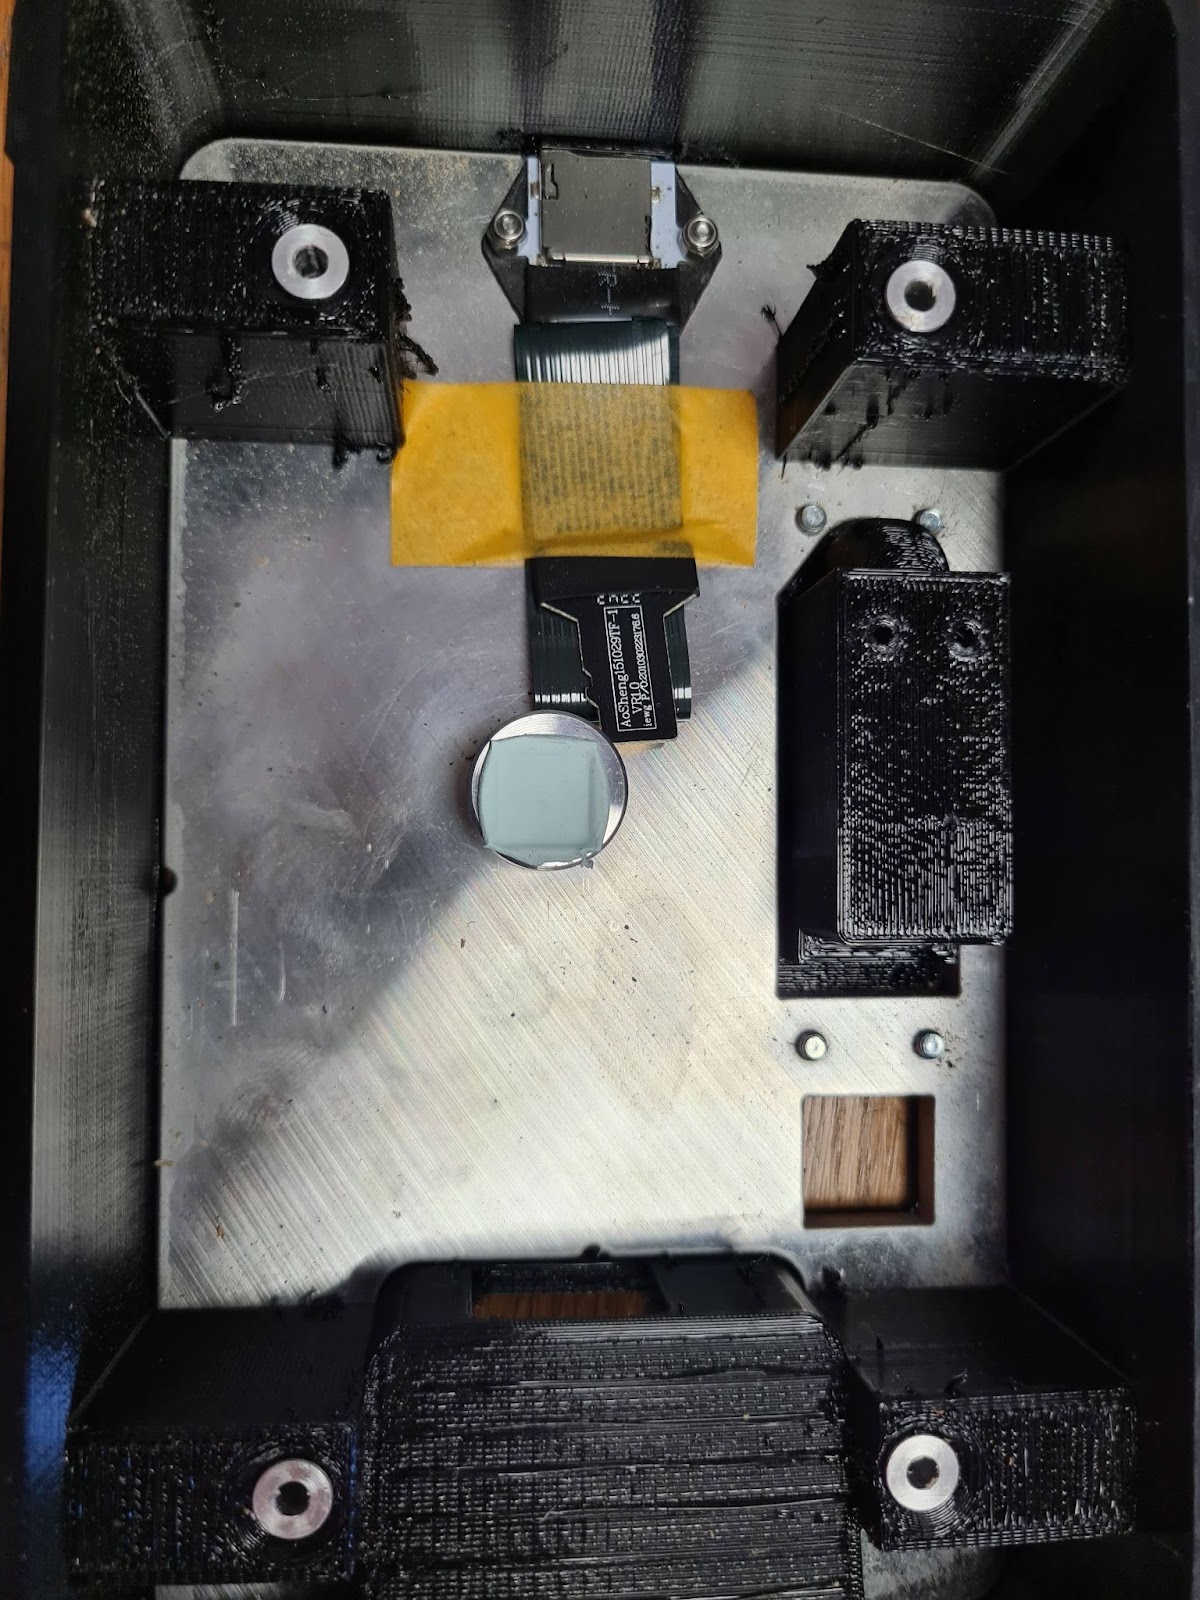
Plug the micro sd card directly into the PCB instead like the below
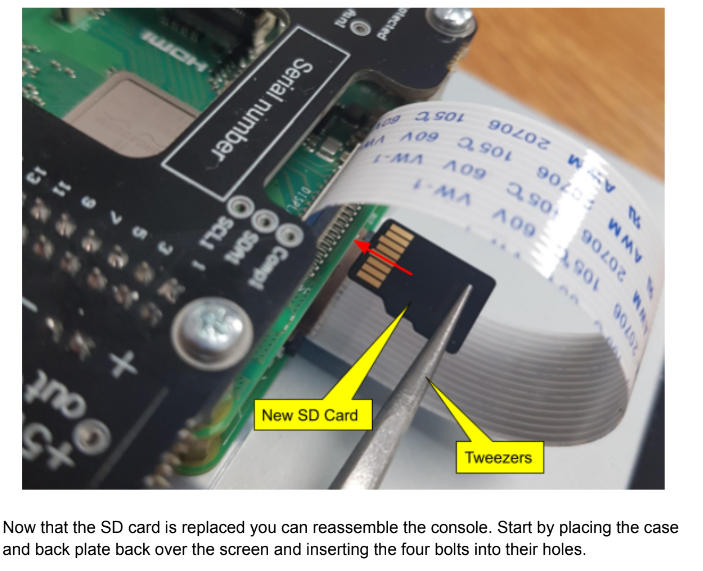
Step 4) Put the console back together
At this point you will need to pick the console up and gently squeeze the screen and back plate together to allow the 4x bolts to engage
Tighten the four bolts with your 2mm Hex Driver taking care not to over tighten them to avoid stripping the threads in the rear of the screen.
Insert the cable into the socket ensuring that it is going in straight and that it is in the correct orientation; if correct the retaining clip will be facing out towards the rear of the console.
Push the cable flat against the bottom of the housing and replace the strain relief clamp. Take care not to overtighten this as it is easy to strip the threads in the plastic housing.
This guide is now complete