To cut accurately on the Z-Axis, you need to make sure all of the tasks below have been checked.
Smartbench has a finished part accuracy tolerance of +/- 0.5mm
|

|
This article is just designed to prevent Z-Axis accuracy issues. If you are looking for the best practice for all of Smartbenches accuracy please see this article
|
Ensure the Z-Axis wheel channels are clean
Use this guide to clean your Z-Axis wheel channels *Z-Axis information is towards the bottom that article* this will prevent any dust and debris from causing inaccurate results
Clean and grease the lead screw(s)
Cleaning and greasing the Lead screw(s) every 50 hours or when necessary (for example after a longer time where it has not been in use) will prevent stalling on the Z-axis and reduce motor load
Check your spoilboard
A spoilboard thicker than 12mm will prevent the beam's ability to iron out any material depth variances and may result in Z axis inaccuracies
Support the upper beam rollers
Ensure the upper beam rollers are always being supported at the same height and that they are not travelling over a rough surface. Click here to learn more about this
You also want to ensure that the upper beam is sat on the stock material where possible so that it is not floating in air.
If this is not possible we recommend using a run off board of the same height as the stock material so that the upper beam rollers have support off the edge of the stock material

Measure your materials actual thickness
Sheet materials can vary in thickness from their stated amount. For example if you order a 12mm thick sheet of plywood you may find it is actually 12.5mm thick. If this is the case you will need to adjust in your design to account for the exact thickness.
This can also vary throughout the sheet so it is worth checking in multiple places
Ensure Smartbenches legs are clamped correctly to the bench
Please see
this guide for more information on this process, this ensures the legs are clamped correctly to the bench are do not get caught at an incorrect angle on the floor
Check for warped materials
This has an effect especially on sheet materials, if it has been stored incorrectly or exposed to water they can bend up or downwards on the outside edges of the material
Thermal deformation
Changes in temperature during a cut can expand or contract your material, ensure your material is cut outside of direct sunlight and that there are no heaters turned on halfway through a cut or an aircon unit is switched on
Also be aware your extraction exhaust can introduce a lot of heat to your workshop
Ensure good workholding
If your stock material is not properly clamped, it may shift position when machining, affecting the geometry of your finished part.
Where possible screwing in stock material would result in the least material movement
Click here to learn more about workholding.

Ramps and Lead ins
Ramps and lead ins prevent any accuracy issues of plunging the tool bit directly into the material we have a guide for how to set this up in Vectric here
Calibrate your machine
Check the probe plate thickness, to do this use a micrometre and follow the guide here
Clean your collet out of any dust and debris
We have an article here on this process
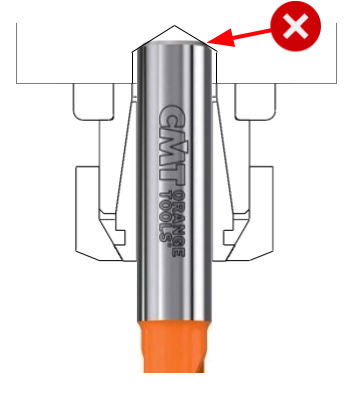
Ensure your cutter is correctly loaded
Make sure that your cutter’s shank is not touching the back of the spindle taper, which can cause the cutter to rotate eccentrically, causing inaccuracy in the cut. Click here to understand the correct procedures of loading a tool into the collet.
Check your cutter condition
Used cutters will deflect much more than new cutters and cause inaccuracy. Click here to learn how to check your cutter condition.
Use appropriate feeds & speeds
Cutting your job with inappropriate feeds and speeds can also deflect the cutter or stall the axes, causing inaccuracy. Click here to understand appropriate feeds and speeds for SmartBench
Preventing tool bit deflection
By using shallower passes this will reduce any cutter deflection
Check your extraction
If dust is not evacuated properly it can get compacted and start deflecting the cutter, causing inaccuracy
For SmartBench we recommend a MINIMUM flow rate of 70 l/s (litres per second) with a maximum hose length of 1.5 metres. Having a shorter hose length reduces the loss of extraction flow rate from the extractor through the hose.
Having a shorter extraction hose also prevents issues with static buildup

Click here to understand your SmartBench extraction requirements and how to visibly inspect the performance of your extraction.
Click here to learn more about what extractor types and fittings work best with SmartBench.