How to Replace your SmartBench Console XL screen
This article shows how to replace a damaged 10.1 inch Console XL screen
|

|
As with any electrical items, all work you carry out on SmartBench should be performed in a clean environment to avoid any debris getting into components and potentially causing damage.
|
Tools you will need:
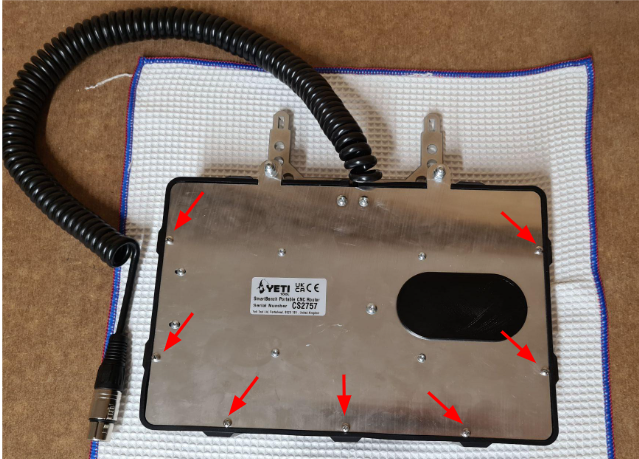
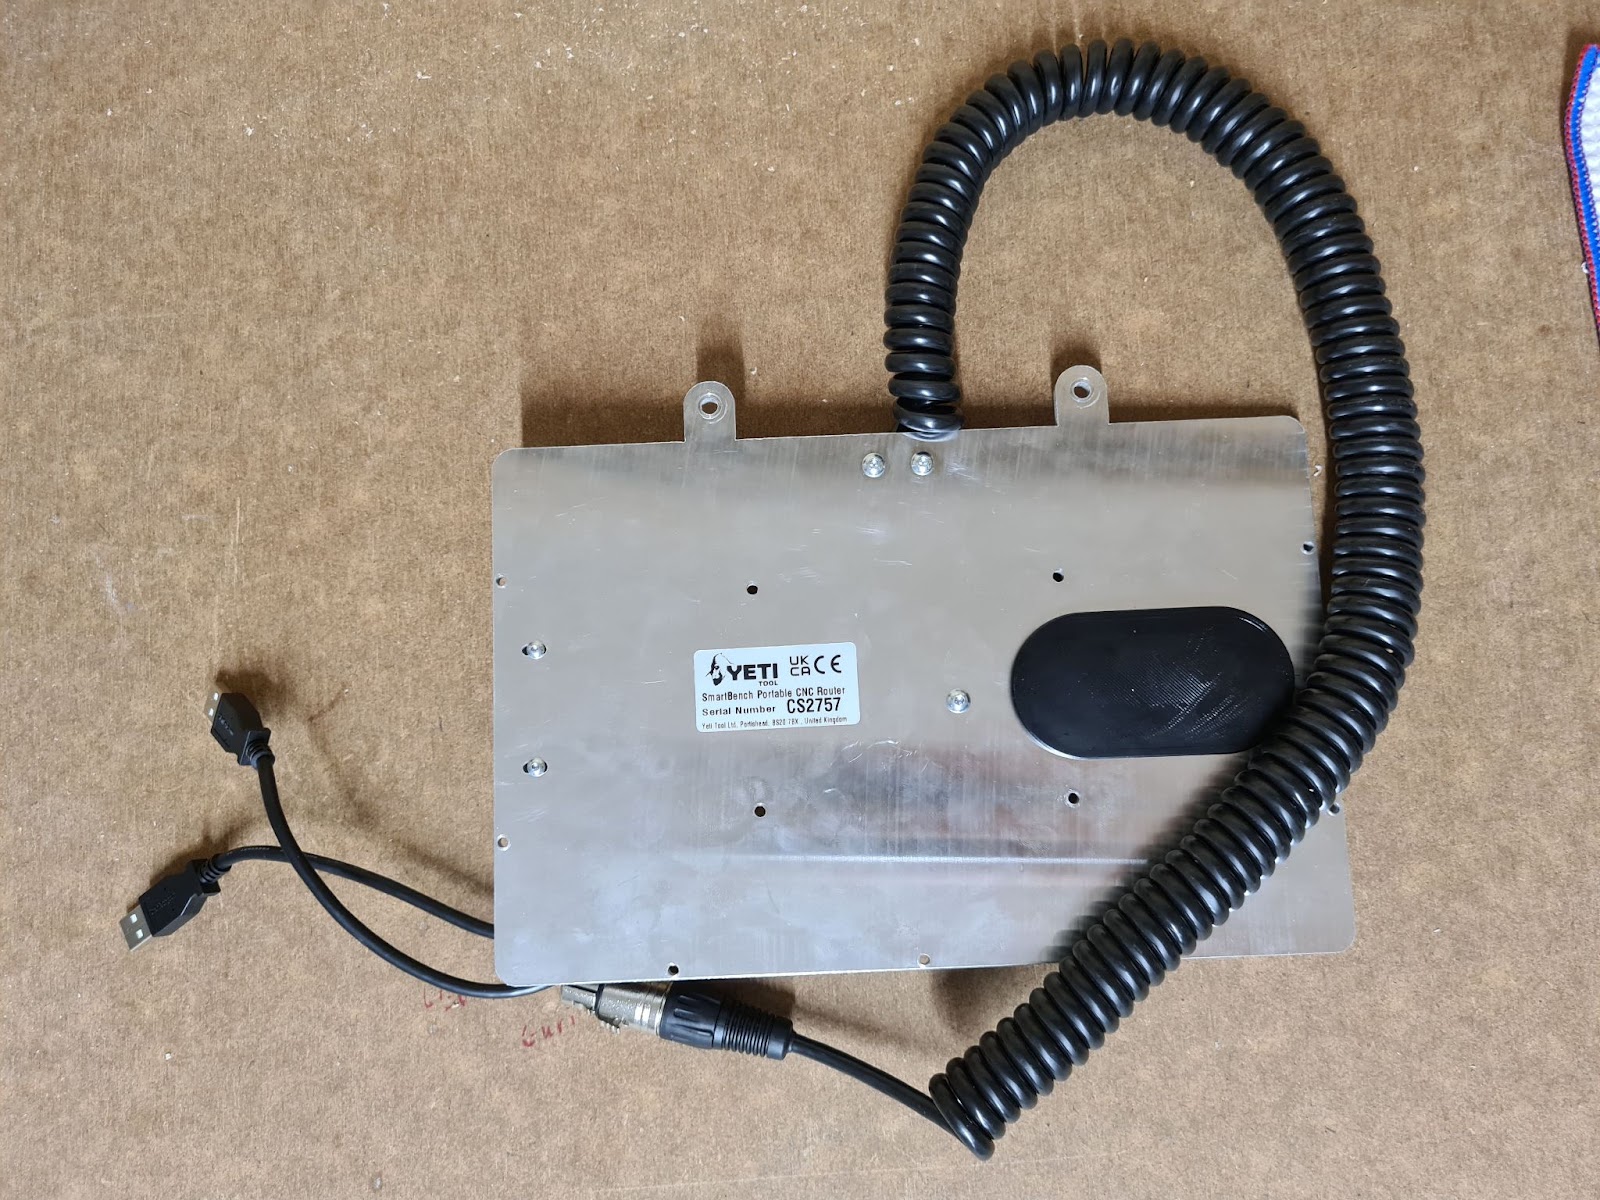
First remove your console XL from your Smartbench and place it screen down onto a flat (preferably soft) surface ensuring that there is nothing on the surface that could scratch or damage the screen. We recommend laying it down on a microfiber cloth.
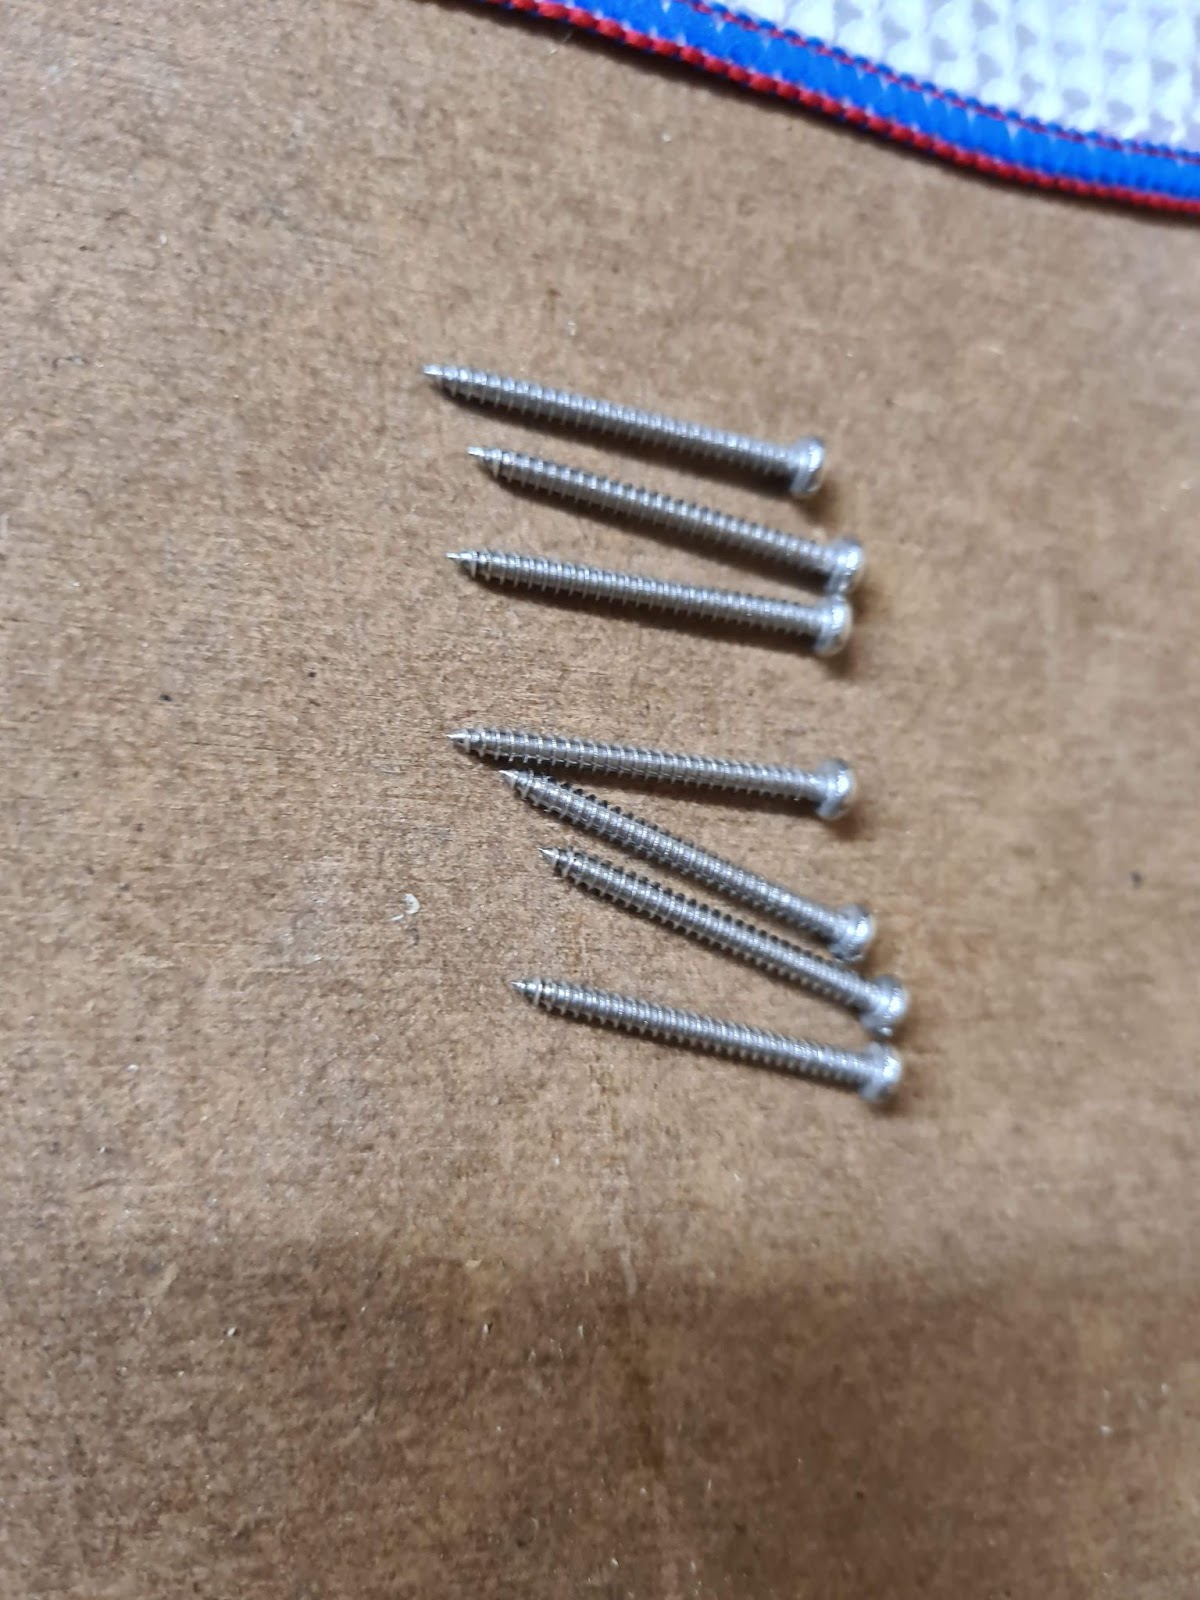
Step 1) Start the disassembly process by removing all 7 PZ1 screws on the backplate
Step 2) Remove the four central bolts which hold on the backplate with your 2mm hex driver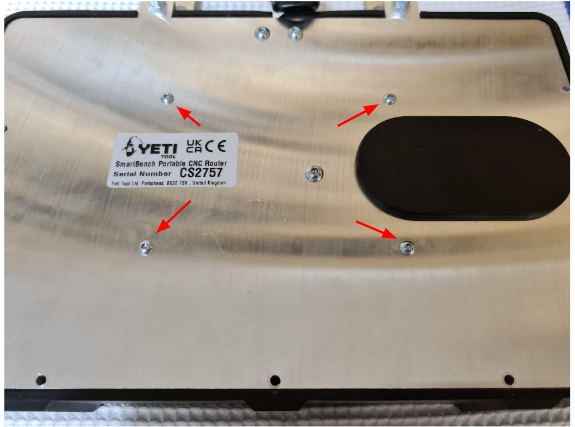
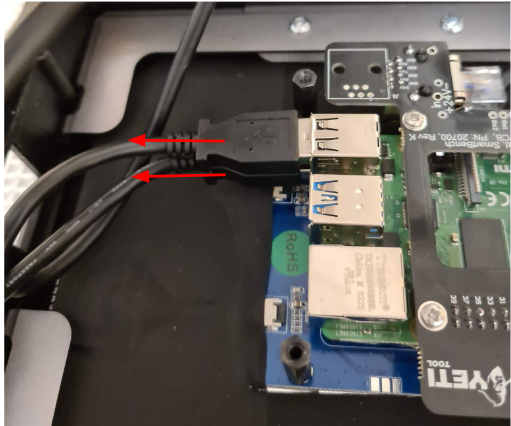
Step 3) Lift the backplate up slightly and remove the connection points
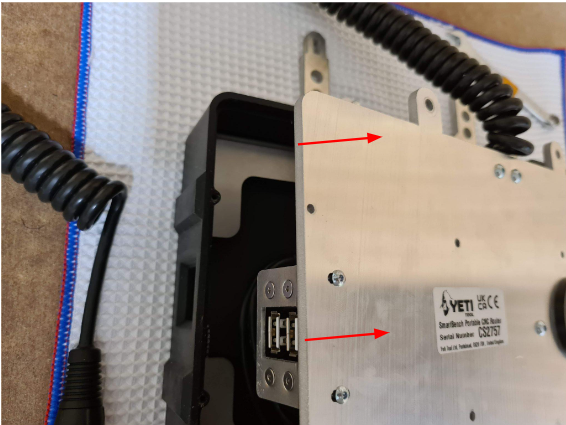
Unplug the two USB extenders by pulling backwards
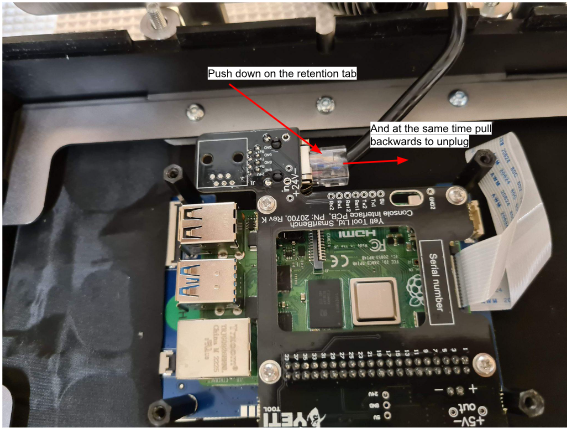
And then remove the RJ45 connector by pushing down on the retention tab and unplugging
Step 4) Remove the backplate completely by lifting upwards and put it to the side for later
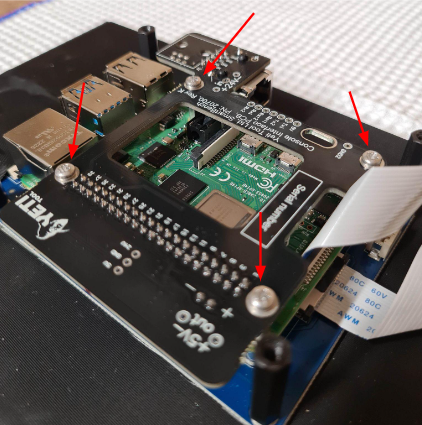
Step 5) Remove the four screws holding on the console interface board
Step 6) If present (dependant on age) unplug the two power wires from the interface board
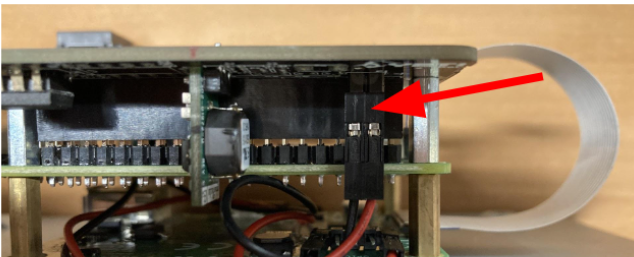
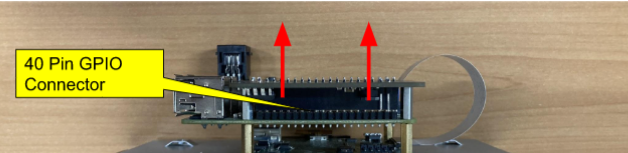
Step 7) With the four screws and the power wires removed you will be able to pull the interface board off the Raspberry Pi by disconnecting the 40 pin GPIO connector.
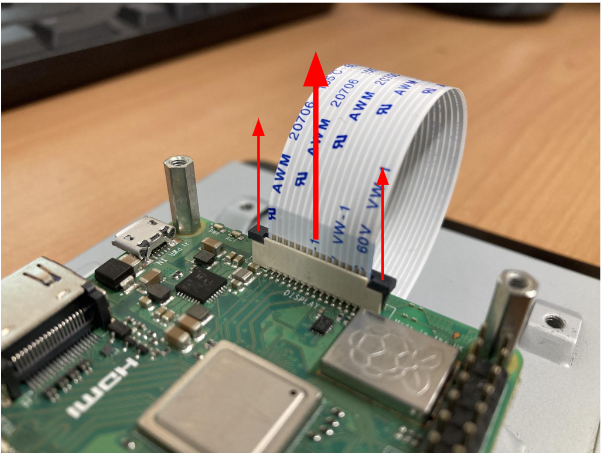
Step 8) Disconnect the display loom from the Raspberry Pi by pulling up both sides of the locking tab then pulling the loom out.
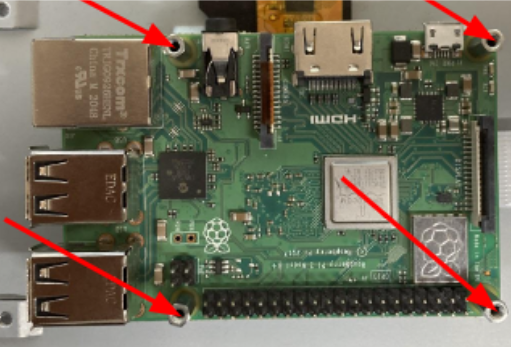
Step 9) Using a 4mm spanner or socket, remove the four M2.5 stand-offs holding the Raspberry Pi to the screen and remove the Raspberry Pi
Step 10) You can now swap the replacement screen in and follow the reverse of these instructions to reassemble your console XL