This will split your current Y axis limit switches into two easily exchangeable switches
Before you start
|

|
Disconnect the lower beam from SmartBench and remove all power cables.
|
Start by removing the Lower X Beam assembly from SmartBench.
Step 1 - Remove the aluminium cover
Remove the 4x M4x8mm bolts on the top side of the case with the 3mm hex driver.
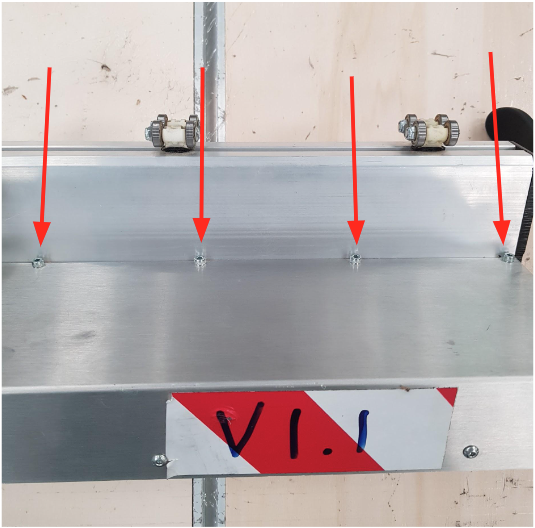
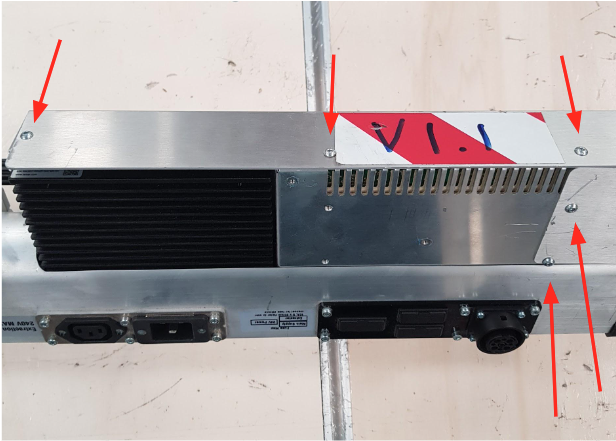
Remove the remaining 5x M3x6mm bolts using the 2.5mm hex driver
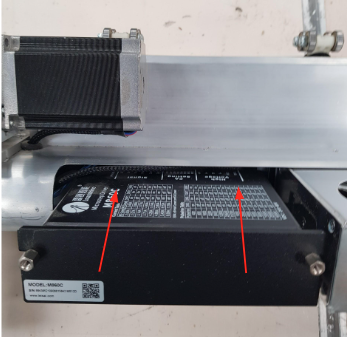
Step 2 - Remove the stepper brick
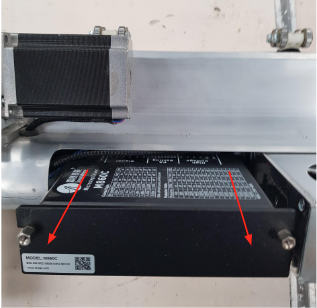
Remove the stepper brick by pulling it towards you. This is a push fit connection
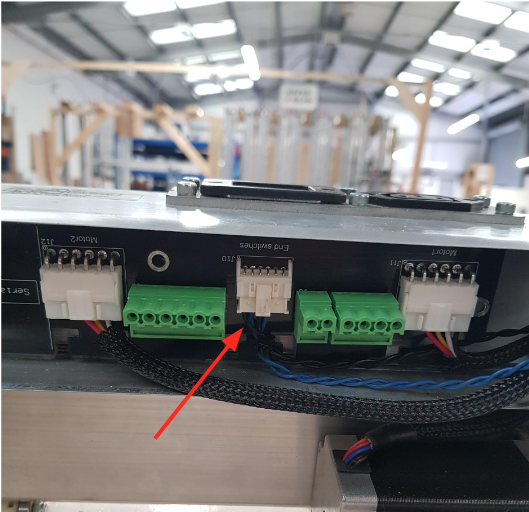
Step 3 - Unplug existing looms
Cut the cable ties holding each of the looms in place if required
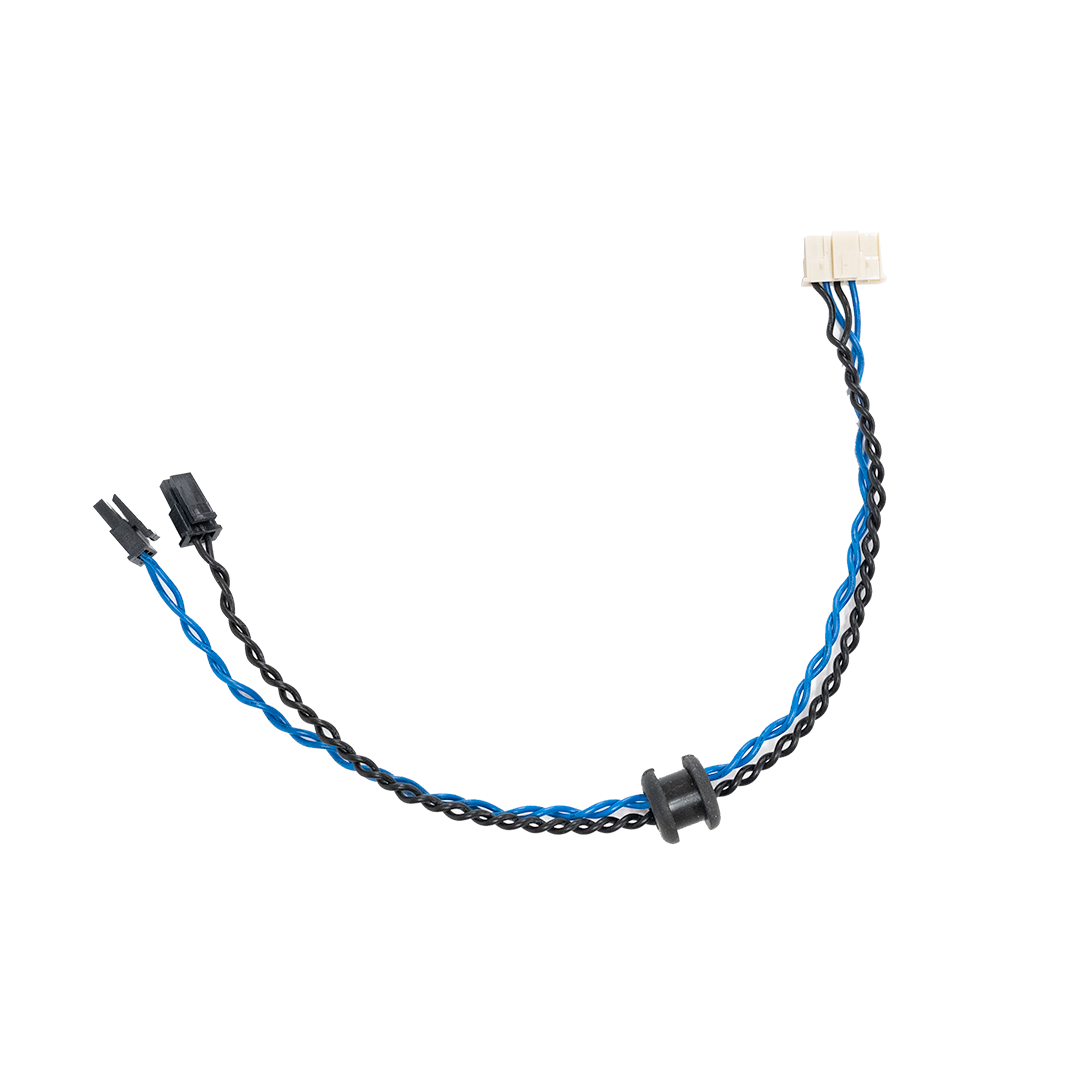
Step 4 - Connect new extension loom
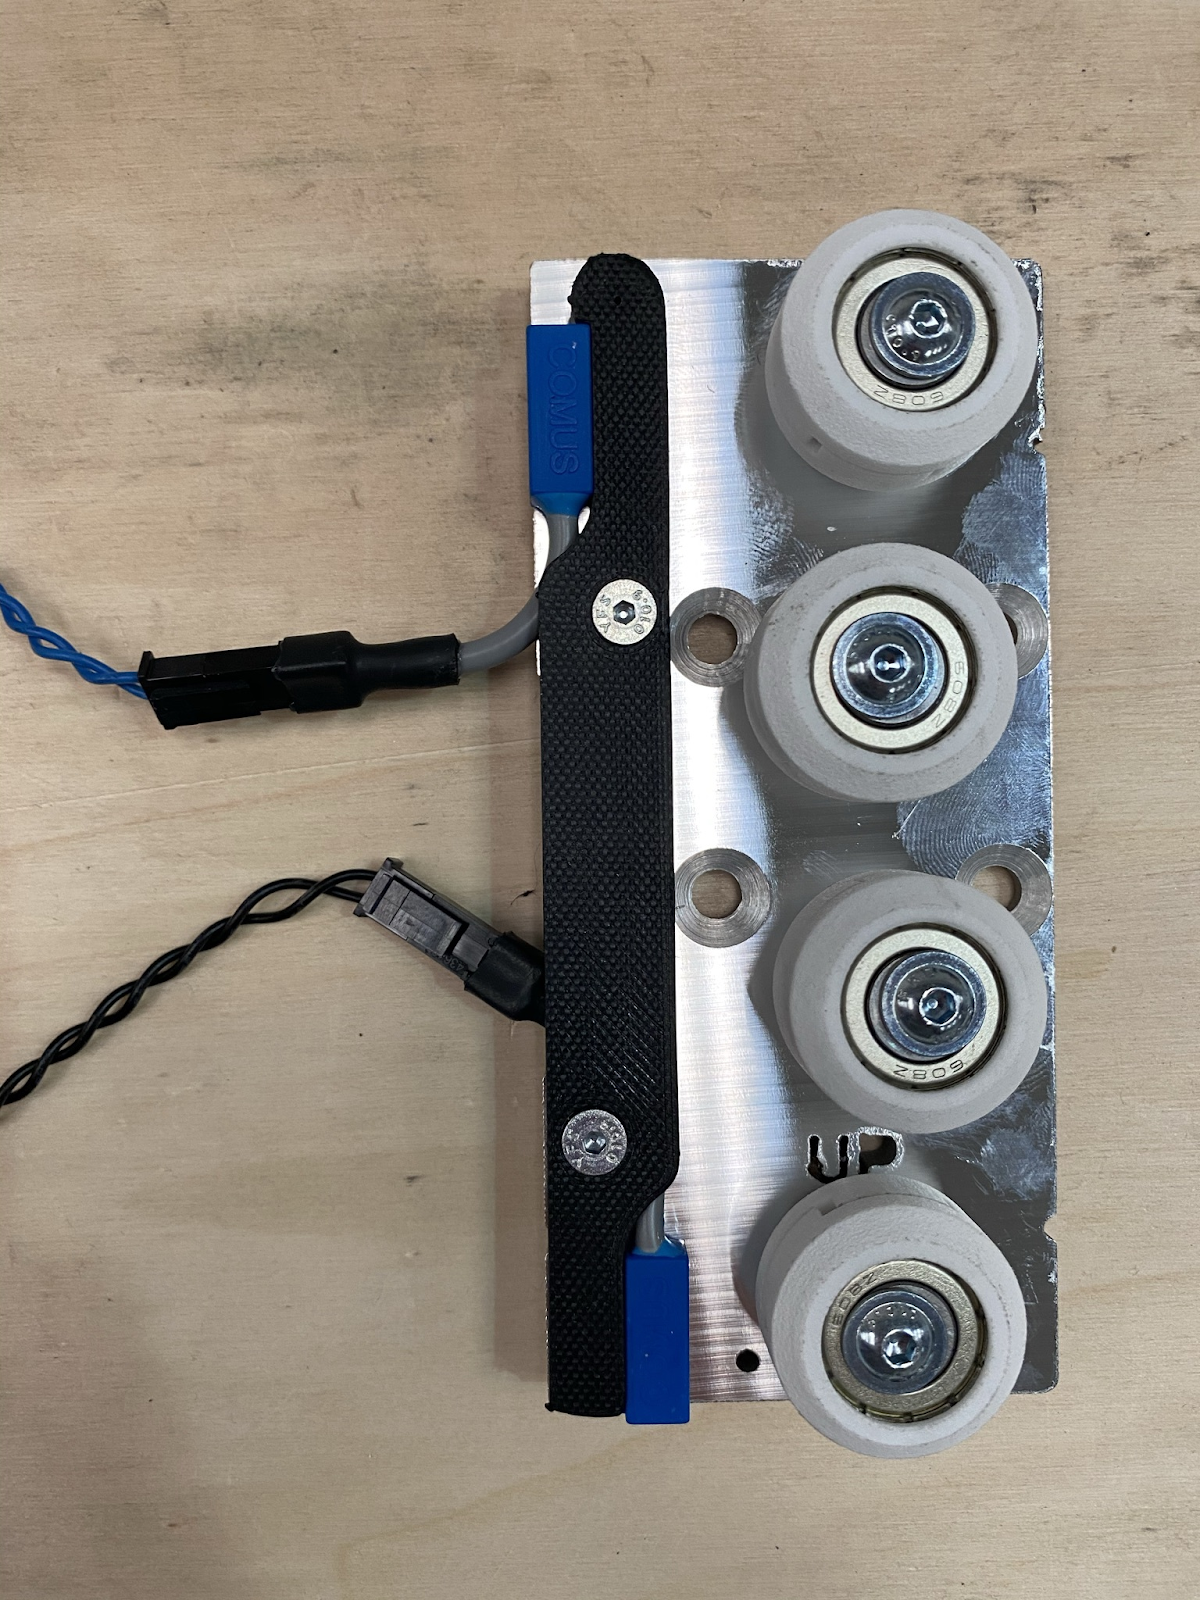
The wheel plate with your existing Y axis limit switches will need to be removed to feed through the new extension loom. To do this remove the four bolts in these positions:

Place on your new Y axis limit switches as per the below layout to your wheel plate
Replace the switches and re-fit ensuring the wires are connected to the correct switch.
Blue wires - Closest to the Home End of the Y bench / Black wires - Closest to the Max End of the Y bench. As per the below photo.
Step 5 - Reinstall your parts
You have now fitted your Y axis limit switch splitter loom, everything is now ready to be put back together.
Bolt your wheel plate back on, this is a good time to ensure that the lower beam wheels are also set correctly, our guide here goes through this process
Plug back in your stepper brick by pushing it back into place on the PCB
Re-attach your aluminium cover with the 9 bolts from step 1
This guide is complete