< Previous | List | Next >
What are finishing passes?
Finishing passes are final passes that remove a very small amount of material from the part to ensure a good surface finish and good dimensional accuracy.
Why should I use a finishing pass?
The higher chip load of the roughing passes can cause the cutting tool to flex (tool deflection) and chatter causing inaccuracy and an imperfect surface finish.
How to add a finishing pass to a pocket toolpath
Roughing cut settings

Draw and select your pocket outline.
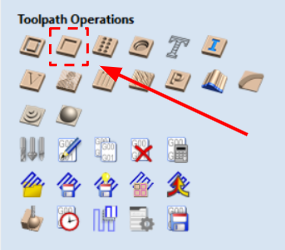
Select the pocket toolpath option

Enter your tool details as usual

Select ‘offset’ as the path type

Enter 0.5 mm for ‘pocket allowance’. This leaves extra material which will be cleaned up on the finishing pass.
This should result in something like this. The number of lines and the distance between them will vary with pocket size and cutter diameter.

Select the pocket outline again but this time, select the profile toolpath option.
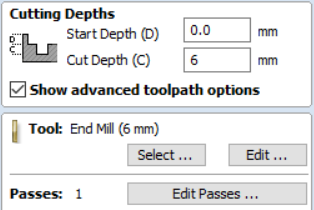
Set your ‘Cut Depth’ to the same depth as your pocket and select your tool. Set your passes to 1
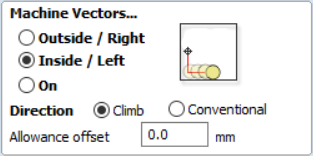
Select ‘Inside/Left’ and set ‘Allowance offset’ to 0.0mm
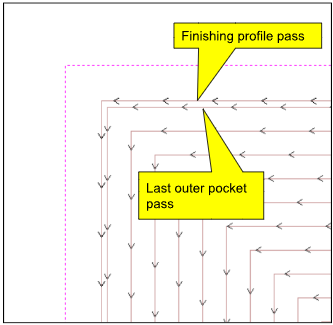
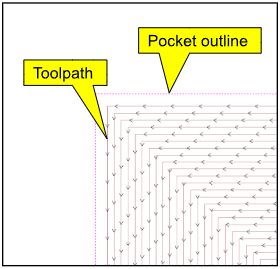
The toolpath preview should now look like this. You can see that the final profile pass will remove a very small amount of material which will keep tool deflection to a minimum.
How to add a finishing pass to a profile toolpath
Roughing cut settings
Draw and select your profile.

Select the profile toolpath option

Set your cut depth and tool type/diameter.

Click ‘Edit Passes’

Tick ‘Set Last Pass Thickness’ and set it to 0.1 mm

Select ‘Outside/Right’ if you are cutting an outer profile.
Select ‘Inside/Left’ if you are cutting an aperture.
In this example we are cutting an aperture.
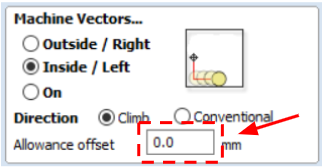
Set your ‘Allowance offset’ to 0.0 mm
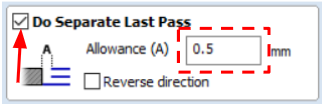
Tick the selection box for ‘Do Separate Last Pass’ and set your allowance to 0.5 mm

The toolpath preview will look like this.
Troubleshooting
CAM Issues
If your tool deflection persists, you may need to consider doing your finishing pass in multiple step downs or step overs. The easiest way to do this is:

Deselect ‘Do Separate Last Pass’ - this is only applicable to profile cuts
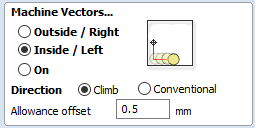
Set your ‘Allowance offset’ to 0.5 mm
Then create an additional profile toolpath using the same vector with an Allowance offset of 0.0 mm. You will have more control over step downs and step overs in this dialogue. If you are unsure how to define these parameters see our Vectric VCarve tutorials.
Further checks
If you are still experiencing inaccuracy issues and cannot fix it with cutting strategy, please follow the guidance in our XY Accuracy & Squareness troubleshooting knowledgebase articles.
< Previous | List | Next >