This article shows you how to cut this material on SmartBench. It also gives you a list of recommended cutters, a performance matrix to help you choose the right tool for your needs, and defines cutting strategies.
< Previous | List | Next >
Overview
This article will take you through how we process this stock material with SmartBench. It will guide you through:
Understanding these areas is critical to achieving high quality and cycle time of your job.
Material notes
Material description
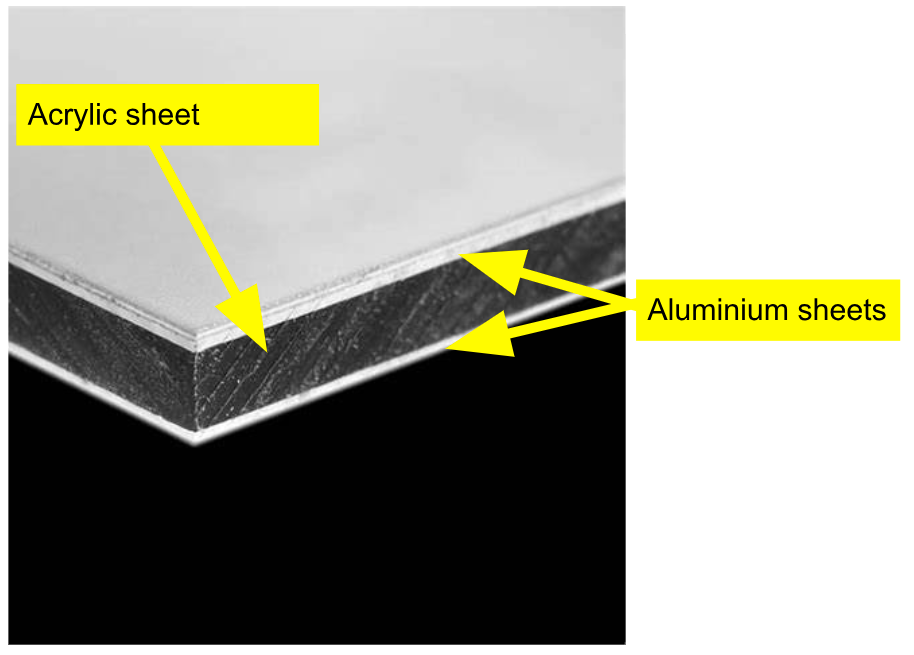
This article describes how to cut ACM (aluminium composite material) also referred to as Dilite, Dibond Digital, Raybond and sandwich panels. It is a composite sheet material composed by pairing acrylic and aluminium together. The sheet is then faced with a lacquer to give its shiny appearance.
Links to the exact material used in Yeti Tool’s testing:
At Yeti Tool, we did our testing with materials sourced from Plasticsonline.
Material variability
The variability between stock materials will be: Low
(High variability is expected when cutting natural materials, and recommendations in this article will likely need more adjustment. Low variability is expected in processed materials, and recommendations in this article will likely need less adjustment.)
Cutter selection
Cutter performance matrix
Use the ‘cutter performance matrix’ below to choose the right type of cutter for your job.
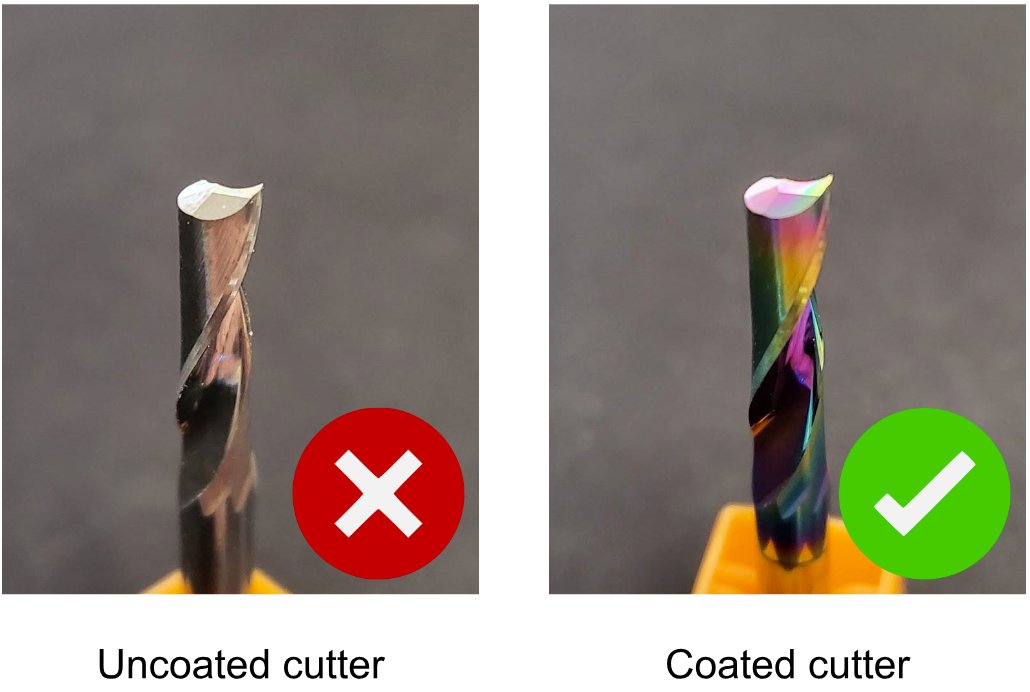
Cutter Longevity
Because the material is hard, the sharpness of the cutter can quickly degrade. Therefore for this material, we recommend using only coated cutters.
Essential note on sharpness
The most important factor in the success of your cut is cutter sharpness. You should never cut with a blunt cutter - it will cause overheating, rough edges, and sticking swarf.

If you see any signs of poor results, begin by inspecting the cutting edges of your tool. See our article on how to inspect your cutter here. If you discover a blunt cutter, replace it immediately.
Cutting strategy recommendations
After you have selected your cutter from the ‘Cutter performance matrix’ in the previous section, use this section to define the best cutting strategy in your job file.
Strategy matrix
To learn about the different strategy parameters, please click on the headings.
|

|
Note: The data presented in this article is from our own testing at Yeti Tool HQ. Our tests were performed using a version 1.3 SmartBench. Here we use a specific supply of materials and cutters (linked). Your supply may be slightly different, therefore take our recommendations as a useful starting point. If at any point you feel that the performance is sub-optimal, please adjust accordingly.
|
|
|
Before starting a cut, please refer to our knowledgebase article on how to assess and correct your strategy in a real world cut as this documents key strategies used to get the best efficiency and quality out of SmartBench. A test cut is suggested to find feeds and speeds that well suit your machine as variability may occur across different setups.
|
Metric data
*We recommend starting at the lowest number in the feed rate range, and adjusting accordingly.
Imperial data
*We recommend starting at the lowest number in the feed rate range, and adjusting accordingly.
Additional strategy requirements
-
Ramps: Required. This is a way of programming your job file to gradually lower the tool bit into the cutting path, rather than plunging directly down into the material.
-
Leads: Required to reduce burn marks along the surface of your material when using multiple passes, and avoid repeated rising and lowering of the spinning cutter in the same location.
-
Finishing passes: Required for accuracy and finish.
Live adjustment
Selecting the right cutter and strategy will prove to be a useful starting point, but there will be variations between setups that may mean the result is sub-optimal.
The most effective way to correct for these variations is to adjust the feeds and speed as the job happens. These can be tuned using the realtime controls on SmartBench. Alternatively, if you have SmartBench PrecisionPro +, you can enable YetiPilot for adaptive feed-rate control.
Workholding
When testing our materials, we use various workholding methods.
For this testing we chose to secure our stock using screws as an easy method of workholding. You need to ensure that your fixtures are placed away from the toolpath so that they are not hit by the cutter when running your job. For more information on general workholding, see our articles here.
Best practice for maintaining accuracy
After the tooling and strategy selection, it is essential to run a machine that is correctly set up. See our article on best practices for accurate cutting.
Final note
We hope this helps you with your project!
Please note that tools listed here are recommendations of solutions which we have found to perform well, but this list is by no means exhaustive. If you have a better experience with a tool not listed here, please submit a support ticket here!
< Previous | List | Next >